BlueStacks is one of the most popular Android emulators, which can help users run mobile apps and games seamlessly on Windows and Mac. However, this program often leaves behind residual files, registry entries, and background processes that continue consuming storage and GPU resources even after a standard uninstall. So, how to uninstall BlueStacks? This comprehensive guide covers all the useful methods. Just read on to find step-by-step instructions!
What is BlueStacks and Why is It Hard to Uninstall?
BlueStacks is a free Android emulator that allows you to play mobile games and run Android applications directly on your Windows PC or Mac. The software successfully bridges the gap between mobile and desktop environments, offering multi-instance support, keyboard mapping, and high-performance graphics rendering.
However, it can be challenging to uninstall BlueStacks when you don’t need it. Many users report BlueStacks won't uninstall errors or persistent background services that slow down their computers.
Here are the main reasons why BlueStacks is hard to remove completely.
Ghost storage bloat: BlueStacks installs large game caches, app data, and virtual Android system files that can consume several gigabytes of disk space. These remnants often remain in hidden folders even after uninstallation.
Registry traps: The software also creates numerous registry entries for background services, startup tasks, and integration with your OS. Standard uninstallation often fails to clean these, which leads to leftover entries that clutter your system.
Locked background tasks: BlueStacks runs multiple services (HD-Player, BlueStacks Services, etc. ) that may stay active in the background, locking files and preventing clean deletion. This might cause high GPU/CPU usage even when the app is not running.
Over time, these issues might lead to system instability. So, how to uninstall BlueStacks? We will cover the most effective methods. Just check out the next part.
How to Uninstall BlueStacks Completely with IObit Uninstaller?
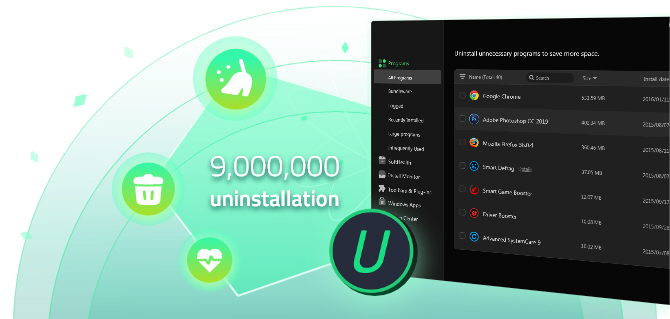
Want to uninstall BlueStacks app completely? IObit Uninstaller is a widely recommended choice. This powerful third-party tool is way more powerful than Windows’ built-in uninstaller feature, which can handle and remove stubborn programs for good!
IObit Uninstaller Free
- Complete forced uninstallation for stubborn programs.
- Uninstall a batch of programs at once.
- Scan and remove leftover files, folders, and registry entries.
- Support the management of Universal Windows Platform apps.
Key Features of IObit Uninstaller:
Auto-uninstall BlueStacks completely
IObit Uninstaller automatically scans and removes every BlueStacks component, for instance, hidden files, services, and caches that standard tools overlook. This ensures a more thorough cleanup and prevents unnecessary files from taking up your disk space.
Uninstall stubborn software easily
Even when a program is difficult to remove, IObit Uninstaller can force uninstall it and delete associated files. You can even use it to uninstall Claude Code for a truly clean up, which is something that normal ways can not achieve.
Fix uninstall issues to uninstall programs easily
The software can find out redundant files, hibernated software, unauthorized permissions, and other issues that affect the uninstallation and system health. You can successfully remove unwanted software in one click!
Detect and remove bundleware
IObit Uninstaller can also identify unwanted bundled programs that may come with software installations. You can uninstall Web Companion and other potentially hazardous applications to keep your PC cleaner and safer.
How to Uninstall BlueStacks with IObit Uninstaller?
Step 1. Free download IObit Uninstaller for your Windows PC. Install and launch the program.
Step 2. Search and locate BlueStacks from the Program categories. Click the Trash icon to start uninstallation.
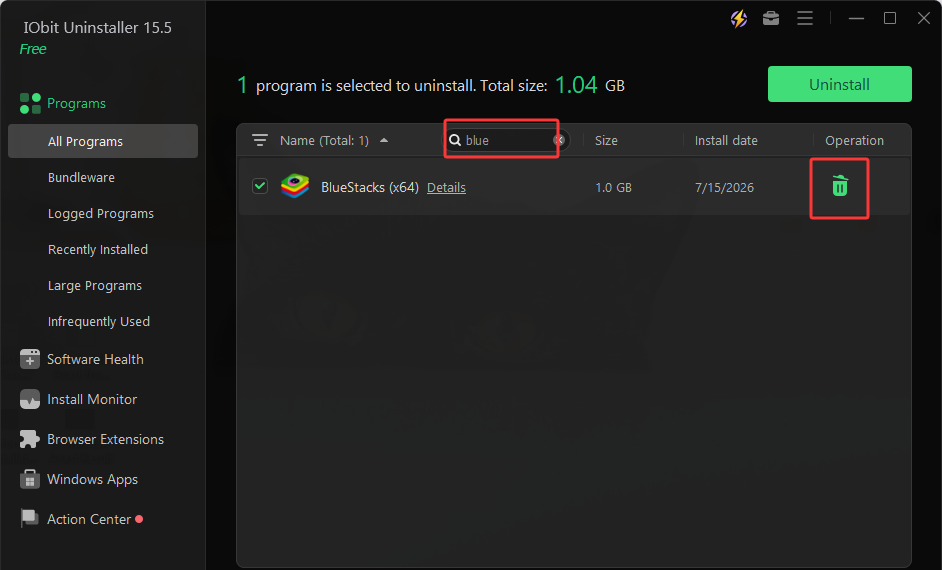
Step 3. In the next window, click the “Automatically remove residual files” to perform a thorough clean.
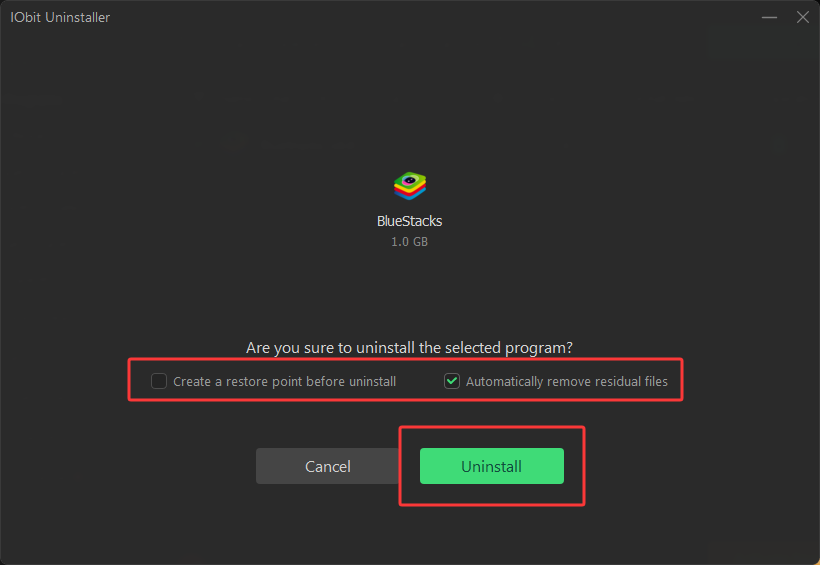
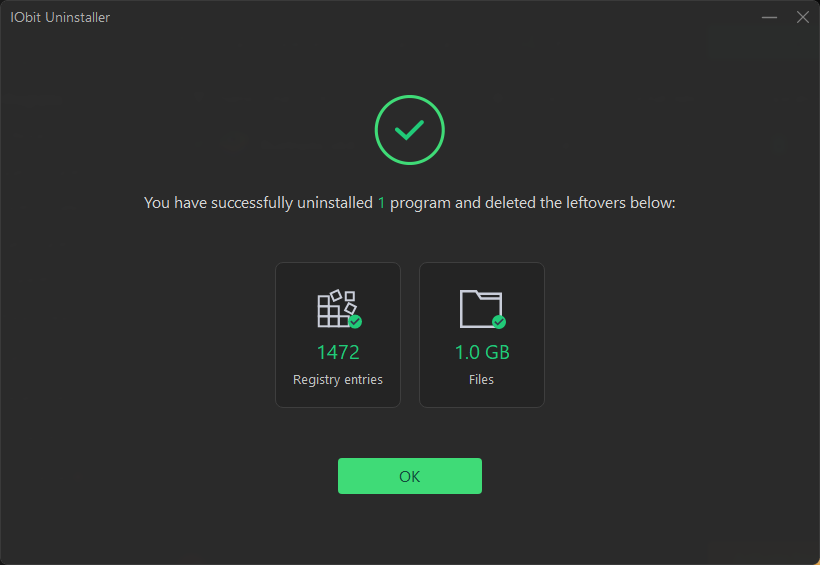
Step 4. After a few seconds, IObit Uninstaller will remove BlueStacks from your computer completely.
How to Uninstall BlueStacks with BlueStacks Cleaner?
With IObit Uninstaller, you can uninstall BlueStacks quickly and easily. Alternatively, the developers offer BlueStacks Cleaner (BstCleaner), an official utility that can completely wipe all BlueStacks files and background services from your system in one go.
How to delete BlueStacks apps with BlueStacks Cleaner?
Step 1. Download the official BlueStacks Cleaner tool from the BlueStacks support website. Choose the appropriate version for BlueStacks 5, BlueStacks X, or Services.
Step 2. Close all BlueStacks-related processes. Then, run the cleaner executable and click “Yes” if you are asked for permission.
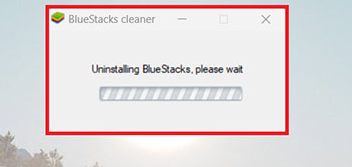
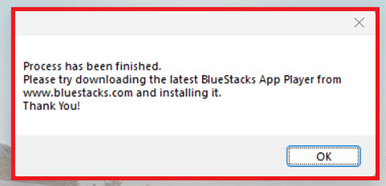
Step 3. The tool will automatically detect installed BlueStacks versions and begin the removal process. Wait until you see the message “Process has been finished”. Click “OK” to close the tool.
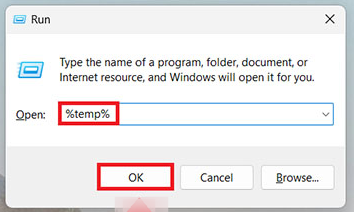
Step 4. Press Windows + R, type %temp%, and press Enter. Delete any remaining BlueStacks-related files and folders. Restart your computer to verify it.
How to Uninstall BlueStacks on Windows and Mac Manually
If you prefer not to use third-party tools, you can remove BlueStacks manually with built-in settings on your OS. However, keep in mind that the default uninstall process may not delete all related files. Leftover folders, cached data, and background components may remain and continue taking up your storage space. Therefore, you will need to remove these residual files manually for a complete cleanup.
How to uninstall BlueStacks on Windows
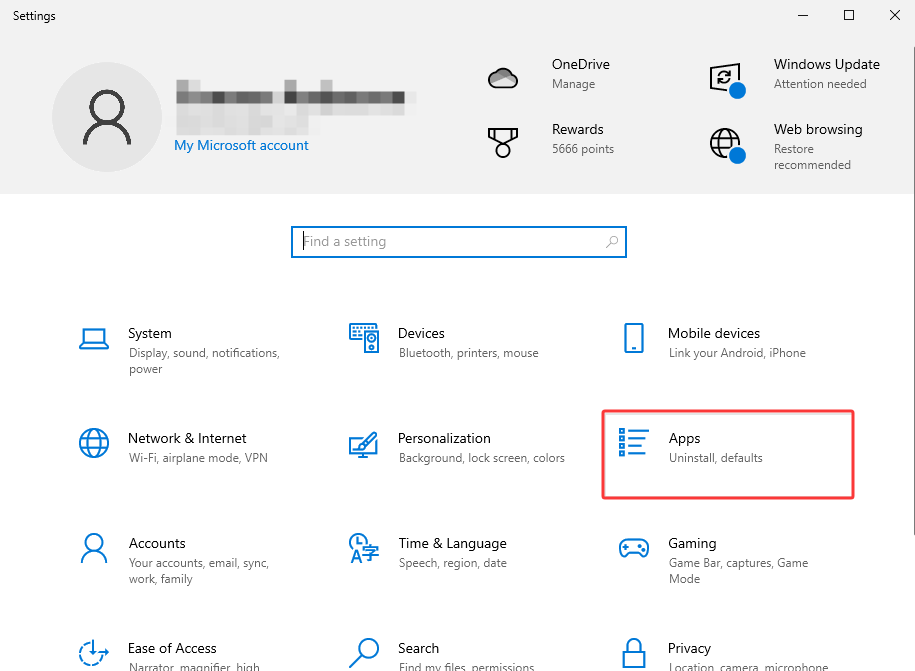
Step 1. Right-click the Start button and select Settings > Apps.
Step 2. Find BlueStacks, click the three-dot menu, and select Uninstall for removal.
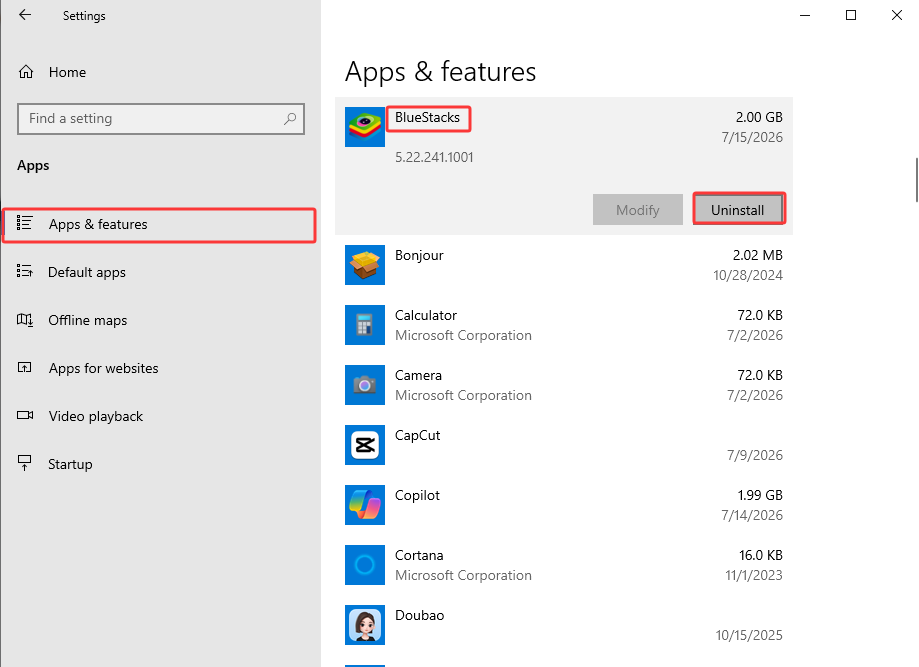
Step 3. When the BlueStacks uninstaller window opens, click Uninstall and confirm the action.
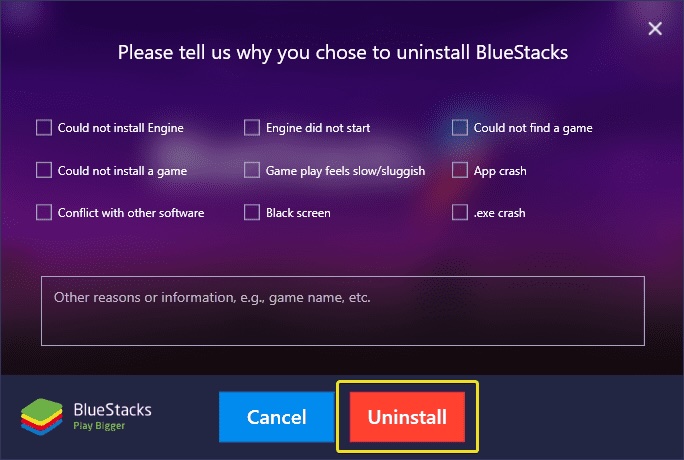
Step 4. Open File Explorer and manually remove any remaining BlueStacks folders via these paths:
C:\Program Files\BlueStacks
C:\ProgramData\BlueStacks
You can also search for “BlueStacks” in File Explorer and delete any remaining related files or folders.
How to uninstall BlueStacks on Mac
Step 1. Open Finder > Applications, locate BlueStacks, and delete the app to the Trash.
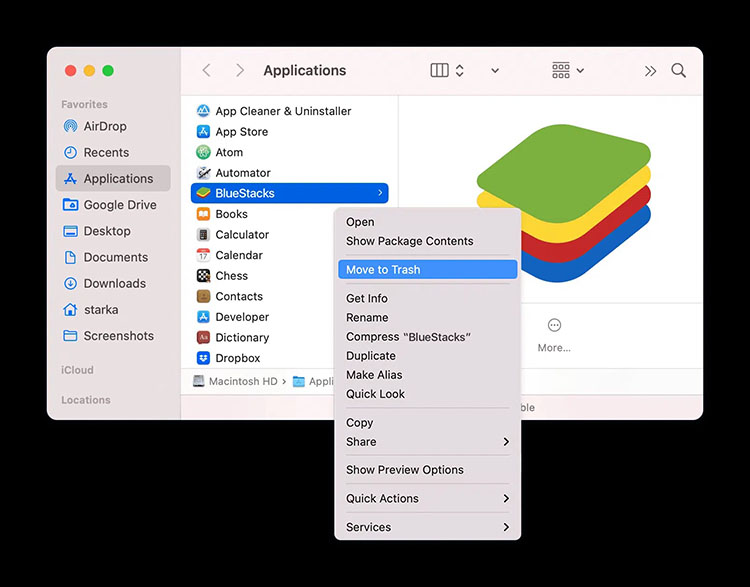
Step 2. Open Finder, select Go > Go to Folder, and check the following locations. Delete any BlueStacks-related files or folders you find.
~/Library/Application Support/BlueStacks
~/Library/Preferences
~/Library/Caches
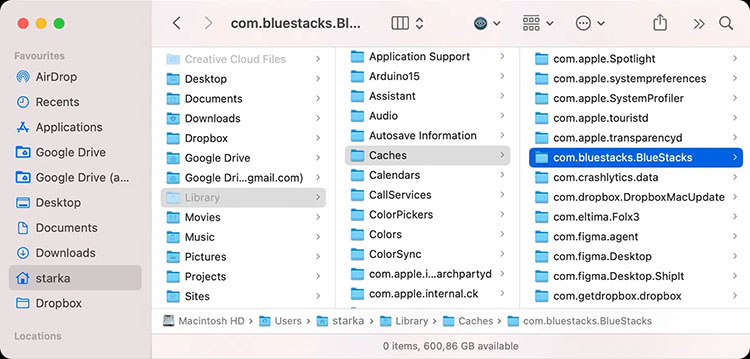
Step 3. After removing all related files, empty the Trash and restart your Mac to complete the uninstallation process.
FAQs about BlueStacks
1.Where is BlueStacks installed?
On Windows, core files usually reside in C:\Program Files\BlueStacks. The user-specific data, like game progress and settings, is stored in C:\ProgramData\BlueStacks. macOS users will find the application in their Applications directory(~/Library/Application Support/BlueStacks).
2.Is BlueStacks safe for PC?
Yes, BlueStacks is safe and legitimate software. To ensure your system’s security, always download the installer exclusively from the official BlueStacks website and only install applications through trusted platforms.
3.Is BlueStacks an emulator?
Yes, BlueStacks is an Android emulator. It creates a virtualized environment on your desktop to mimic the functionality of a physical Android device’s hardware. So your PC can run mobile Android applications and games.
4.BlueStacks how to enable virtualization?
You can enable BlueStacks virtualization via the steps below:
Step 1. Press Ctrl + Shift + Esc to open Task Manager. Go to Performance > CPU and check whether Virtualization shows as Enabled.
Step 2. Restart your PC and press F2, F10, Del, or Esc during startup, or access UEFI settings through Windows Recovery options.
Step 3. In BIOS, enable Intel Virtualization Technology for Intel CPUs or SVM Mode for AMD CPUs, then save changes and restart.
5.Which BlueStacks version is best?
BlueStacks 5 remains the gold standard for most users due to its superior resource management and performance. For systems with extremely limited hardware, specialized "Lite" variants exist, but the official BlueStacks 5 is recommended.
Conclusion
How to uninstall BlueStacks? This blog has introduced several effective methods to help you remove BlueStacks completely from your Windows PC or Mac. You can uninstall it through Windows/Mac Settings, or use a dedicated uninstaller. While the native methods can work, they may require extra steps to find and remove residual data. That’s why IObit Uninstaller stands out, which can automatically scan for and remove BlueStacks files, stubborn components, and unwanted leftovers with ease. Just get it to enjoy a hassle-free uninstalling experience now!