The stop code driver verifier DMA violation is an error that causes a blue screen, which can greatly interrupt your work and daily tasks. The problem becomes even more frustrating when your PC enters a repeated restart cycle. However, it seems many users still don’t know how to fix the issue. Fret not. This blog will introduce what the error means, why it happens, and how to fix driver verifier DMA violation with 8 practical methods. Just read on to find useful fixes that can help you restore your PC to a stable state!
What Is “Driver Verifier DMA Violation” Error
The driver verifier DMA violation error is a Blue Screen of Death (BSOD) issue with the stop code 0xE6. It occurs when Windows detects that a driver has performed an invalid Direct Memory Access (DMA) operation, which is tested by the Driver Verifier tool. This error means a tested driver violated DMA rules, and it causes Windows to trigger a crash to protect the system from potential damage.
What Triggers the Driver Verifier DMA Violation Stop Code
The blue screen of death driver verifier DMA violation error can be triggered by various factors. We have listed the possible causes below to make troubleshooting easier.
Faulty or outdated drivers: Drivers with bugs, missing updates, or incorrect DMA handling are the most common causes.
Incompatible software: Programs that install low-level drivers, security filters, or hardware management tools conflict with Driver Verifier, which causes the issue.
Corrupted system files: Damaged system files can affect the communication between drivers and the OS, leading to the driver verifier DMA violation 0xe6 issue and sometimes the PC stuck on boot screen.
Windows updates: A driver verifier DMA violation Windows 11 upgrade may occur if older drivers are not fully compatible with the newer system environment.
Hardware compatibility problems: Faulty RAM, storage controllers, or external hardware can also trigger DMA-related violations.
How to Fix Driver Verifier DMA Violation
Now you should have a clue about the reasons behind the issue. In this part, let’s see how to fix driver verifier DMA violation with practical methods,
1. Disable Driver Verifier
The quickest driver verifier DMA violation fix is to turn off this built-in Windows diagnostic tool(if it’s the only trigger). So it won’t force-scan your driver and cause the issue repeatedly.
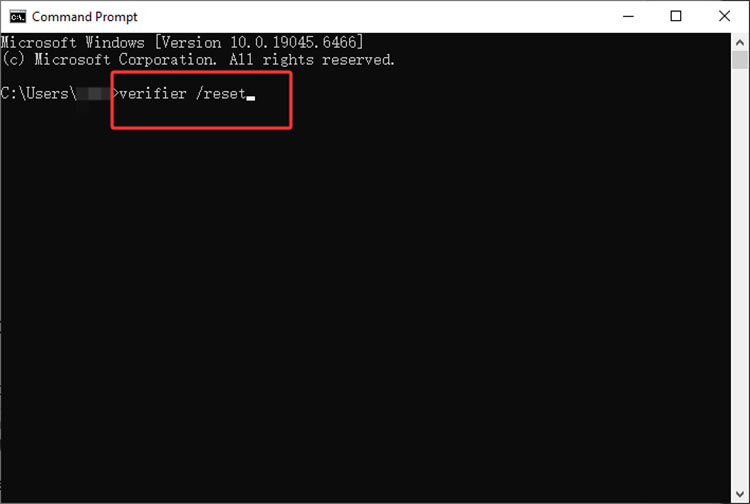
Step 1. Press Windows + R, type cmd. Then press Ctrl + Shift + Enter to open the Command Prompt as an administrator.
Step 2. Type verifier/reset and press Enter. Restart your computer after that.
2. Update Driver or Roll Back
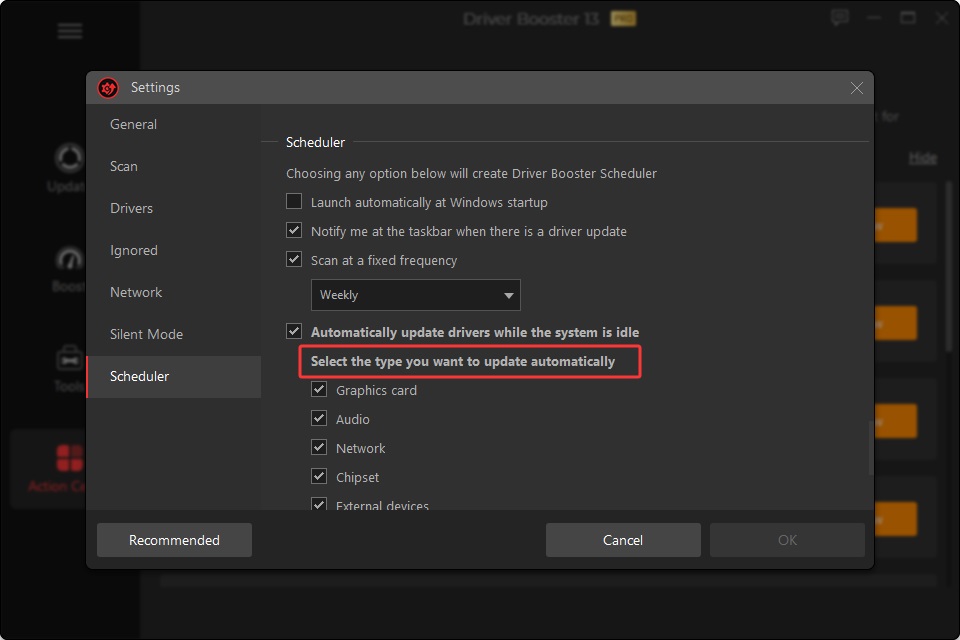
As introduced earlier, outdated or corrupted drivers are common causes of the driver verifier DMA violation error. In this case, you will need to update those drivers to fix the issue. However, manually searching for the right drivers can be time-consuming. This is where Driver Booster comes into play, which simplifies this process as a whole.
It can scan your PC, identify faulty or outdated drivers, and install the latest official versions securely within a few seconds. In addition, it can solve driver-related issues that may cause poor game performance. For instance, you can easily fix Roblox lag for a smoother gaming experience with it!
How to Update Drivers to Fix Driver Verifier DMA Violation?
Step 1: Download Driver Booster and install it on your Windows PC for free.
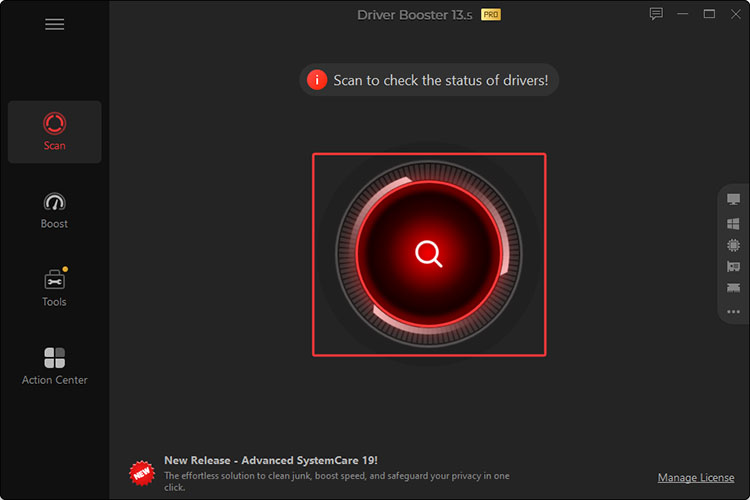
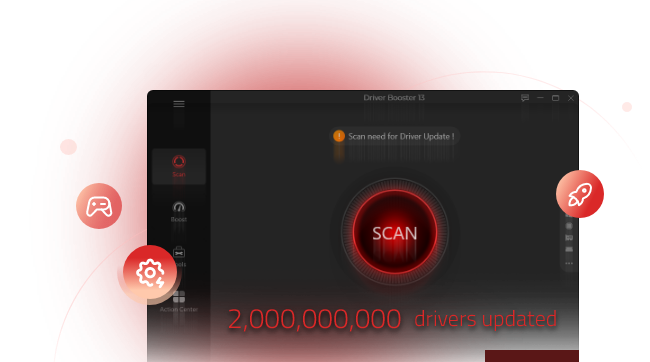
Step 2: Launch the software and click the big Scan button. Driver Booster will check all installed drivers on your PC.
Step 3: Then it will list all the outdated/corrupted ones within seconds. Click on the update button to install the latest drivers.
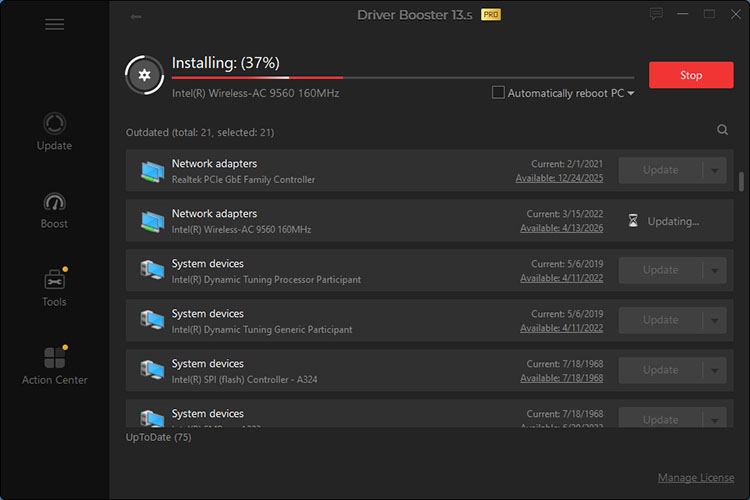
Step 4: After a few minutes, all the outdated drivers will be fixed. Then restart your computer.
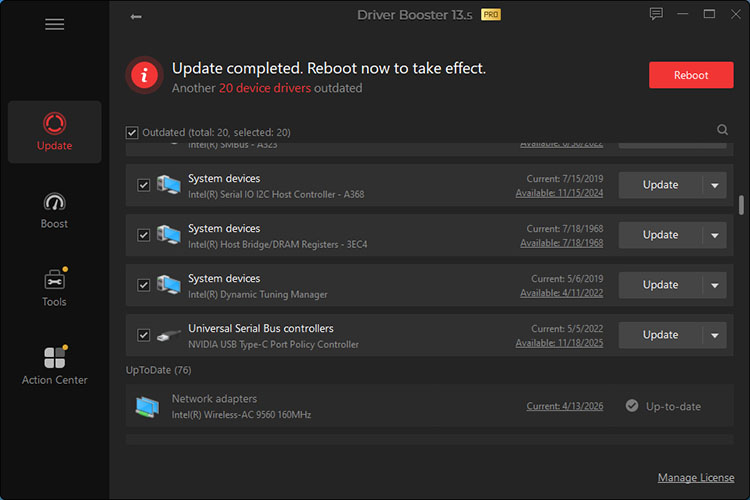
Driver Booster also includes a convenient Backup & Restore feature. Before any update, it can automatically create a system restore point and back up the current driver versions. If a new driver causes problems, you can roll it back with one click!
Key Features of Driver Booster
• Auto Driver Status Scan, Update, and Fix
There is no need to search manually; This automatic driver updater can detect outdated, problematic drivers and update them seamlessly. You can download and install drivers in one click!
• Cover Whatever Drivers You Need
Is your audio driver not working as well? Worry not. With a database of over 12 million drivers, the software covers all major categories and more than 2,500 manufacturers. You can truly find whatever you need.
• Roll Back to Previous Driver Version Easily
Its built-in backup and restore functions can automatically create system restore points. You can easily revert to a previous working driver version whenever needed.
• 1 Click to Fix Incompatible Drivers & More Issues
It can quickly detect and resolve common driver-related problems. You can fix device errors, missing drivers, and compatibility conflicts to maintain overall system stability.
Driver Booster Free
- Automatically scan and update drivers.
- Update game ready drivers for peak gaming performance.
- Identify and fix various common of hardware issues.
- Boost 30% of system performance for fast & smooth running.
3. Boot into Safe Mode When Driver Verifier DMA Violation Loops
Sometimes, you might also encounter the driver verifier DMA violation loop, which prevents your system from starting normally. In this case, Safe Mode is a great help. It loads only essential drivers and services, providing a stable environment to troubleshoot and apply fixes. Here’s how to fix driver verifier DMA violation with it.
Step 1. Force your PC to shut down three times during startup (hold the power button) until the Automatic Repair screen appears.
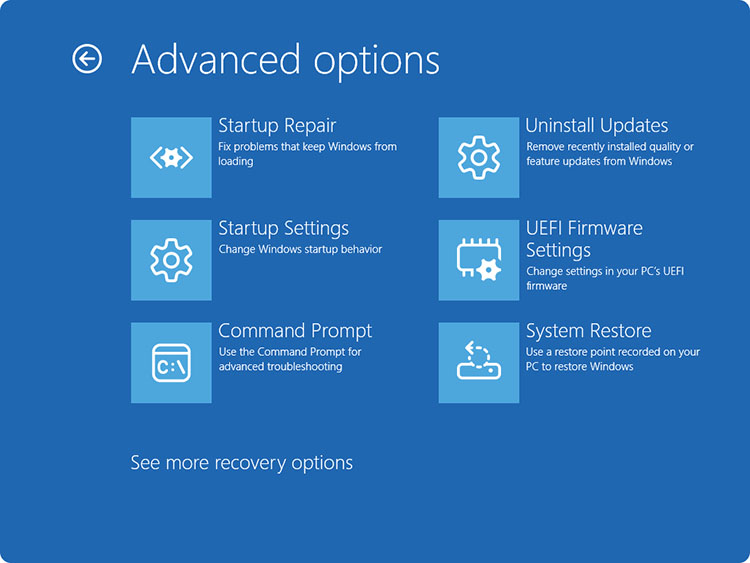
Step 2. Select Troubleshoot > Advanced options > Startup Settings > Restart.
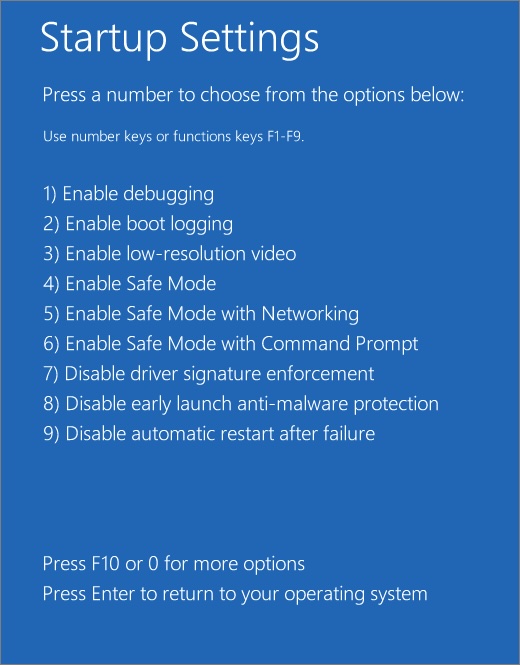
Step 3. After restarting, in the Startup Settings screen, pick Enable Safe Mode to boot Windows normally.
Step 4. Once in Safe Mode, disable Driver Verifier or update drivers as described above, then restart your PC.
4. Run SFC Scan
Corrupted system files can cause drivers to malfunction and trigger the blue screen of death driver verifier DMA violation error. But worry not. You can use the System File Checker (SFC), a built-in Windows tool that scans and repairs damaged system files. Here’s how.
Step 1. Open Command Prompt as administrator.
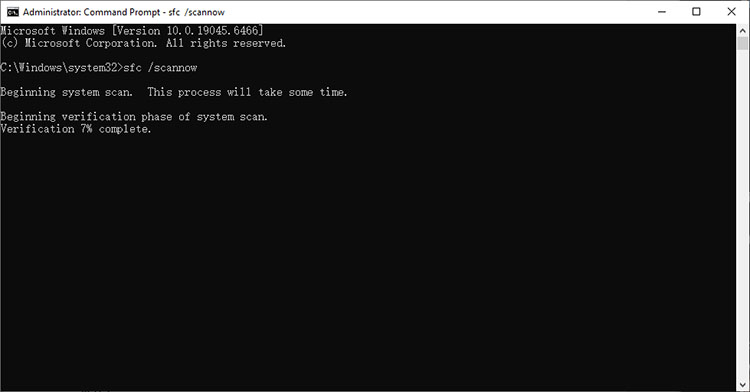
Step 2. Type sfc /scannow and press Enter.
Step 3. Wait for the scan to complete (this may take 15-30 minutes). Restart your computer and check if the issue is resolved.
5. Use Windows Memory Diagnostic
Faulty RAM or memory-related hardware issues can also interfere with DMA operations and trigger this driver verifier DMA violation code. But the Windows Memory Diagnostic tool can help detect such problems. Here’s how to check physical memory access issues/RAM/failing hardware components.
Step 1. Search for the Windows Memory Diagnostic on your Windows.
Step 2. Select Restart now and check for problems. The diagnostic tool will run automatically during reboot.
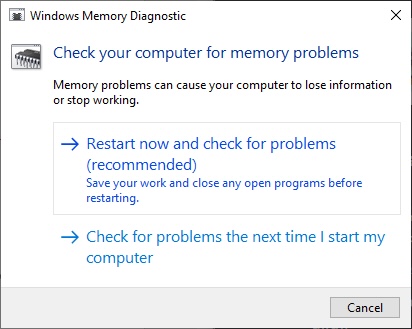
Step 3. After the test finishes, Windows restarts. After logging back in, a notification should pop up in the corner with your test results.
6. Uninstall Incompatible Software
Recently installed programs with low-level drivers may conflict with Driver Verifier and cause the DMA violation. In this case, you will need to remove the software to resolve the issue. Here’s how to uninstall one via Windows Settings.
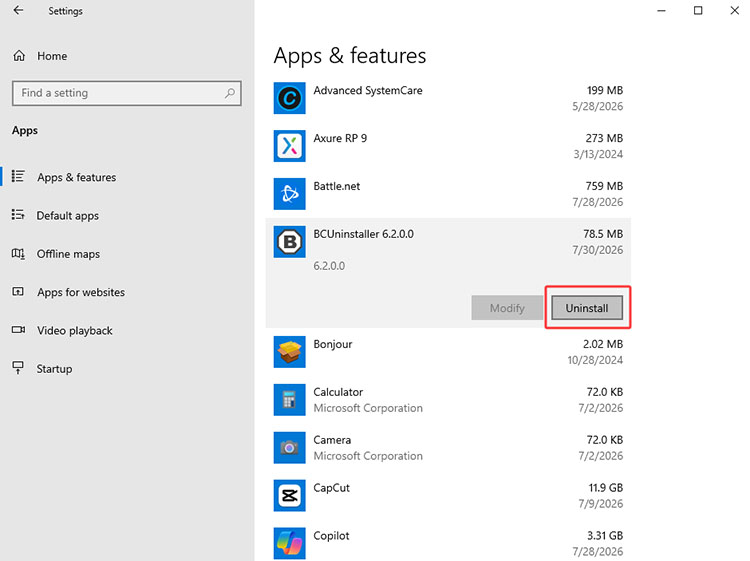
Step 1. Open Settings > Apps > Apps & features.
Step 2. Scroll the app list and identify any software added shortly before the error begins.
Step 3. Select the program and click Uninstall. Restart your PC and see if this helps.
While this standard method can uninstall most software on Windows, it may not completely clean leftover files or registry entries. Want to make a more thorough cleanup? Consider IObit Uninstaller. It can remove multiple apps at once, scan for residual files, and detect problematic software. This helps eliminate conflicts and improve overall system stability. Just see it yourself!
IObit Uninstaller Free
- Complete forced uninstallation for stubborn programs.
- Uninstall a batch of programs at once.
- Scan and remove leftover files, folders, and registry entries.
- Support the management of Universal Windows Platform apps.

7. Update BIOS As a Driver Verifier DMA Violation Fix
Outdated BIOS firmware can lead to compatibility issues with modern DMA protection features, which can be rather common after a system upgrade. All you need to do is update the BIOS to resolve these conflicts. Here’s how.
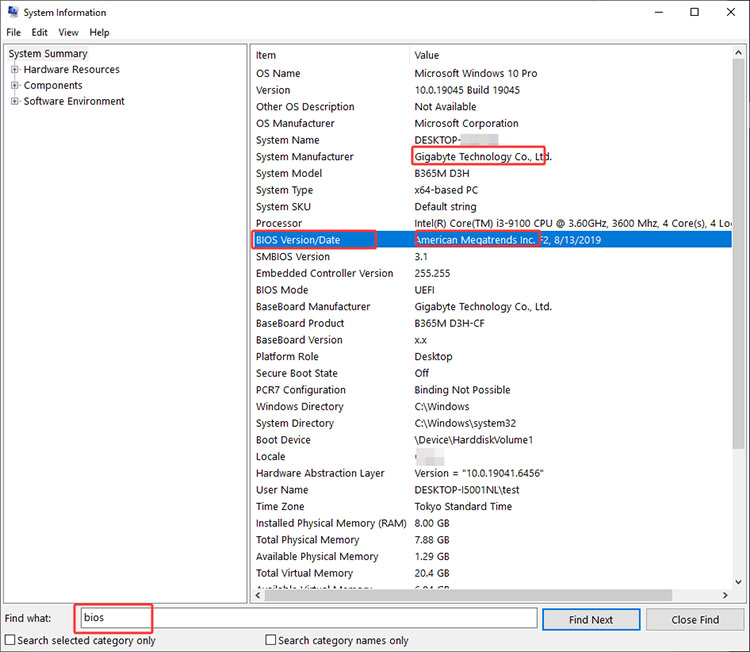
Step 1. Press Win + R, type msinfo32, and press Enter to open System Information. Note your BaseBoard (motherboard) model and BIOS version.
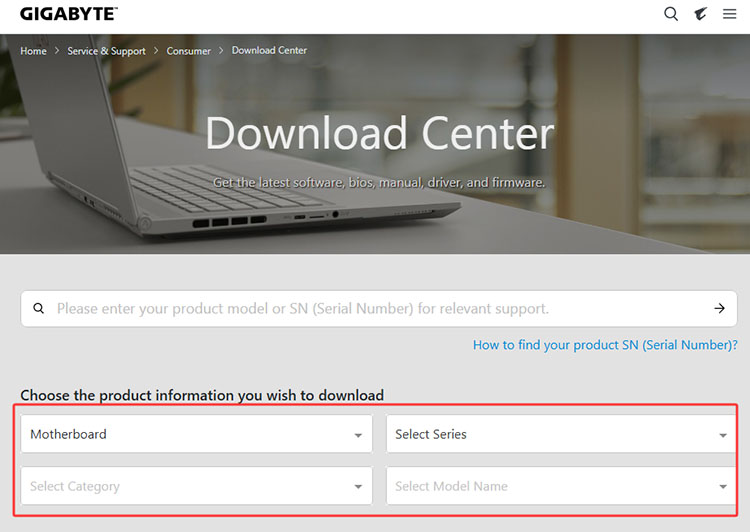
Step 2. Visit your motherboard manufacturer’s official website and download the latest BIOS version for your model.
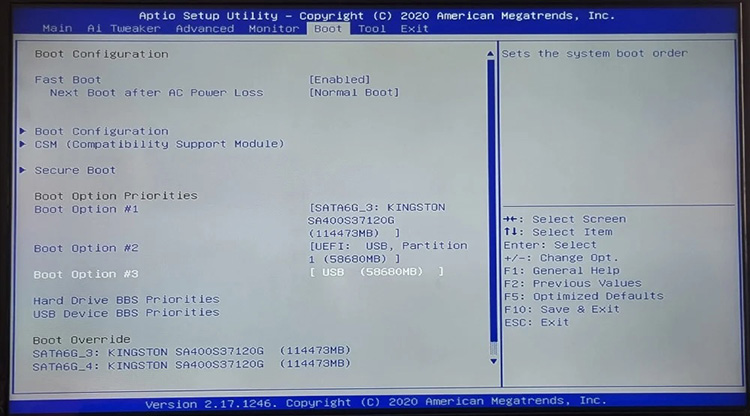
Step 3. Prepare a USB drive (formatted to FAT32) and copy the extracted BIOS file(usually a ZIP) onto it. Restart your PC and enter the BIOS (Press Delete or F2 during startup).
Step 4. BIOS programs vary slightly depending on your device. For instance, select the Boot tab and confirm that your USB drive is detected. Then, enable any available backup options if needed.
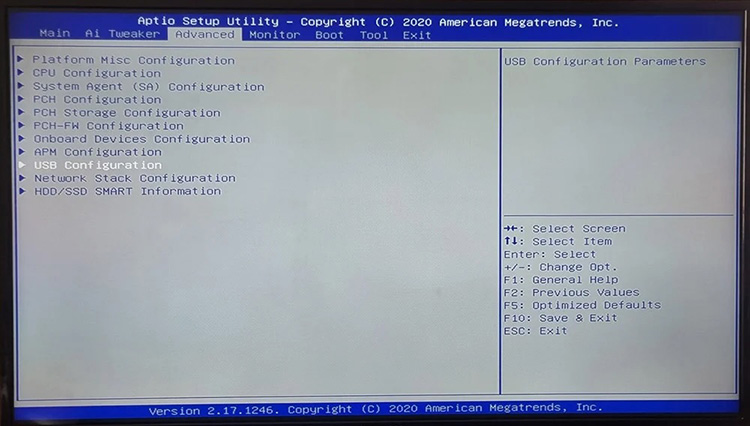
Step 5. Open the Advanced tab, select USB configuration, and choose the BIOS update option. Follow the prompts and allow your computer to complete the update process.
8. Reset Windows
If you have tried all previous methods and they don’t seem to work, it might be time to reset Windows, which is also the last driver verifier DMA violation fix. The feature will reinstall the operating system with personalized files kept. Let’s see how to do it step by step.
Step 1. Go to Settings > System > Update & Security > Recovery (Windows 10). Under “Reset this PC,” click Get Started.
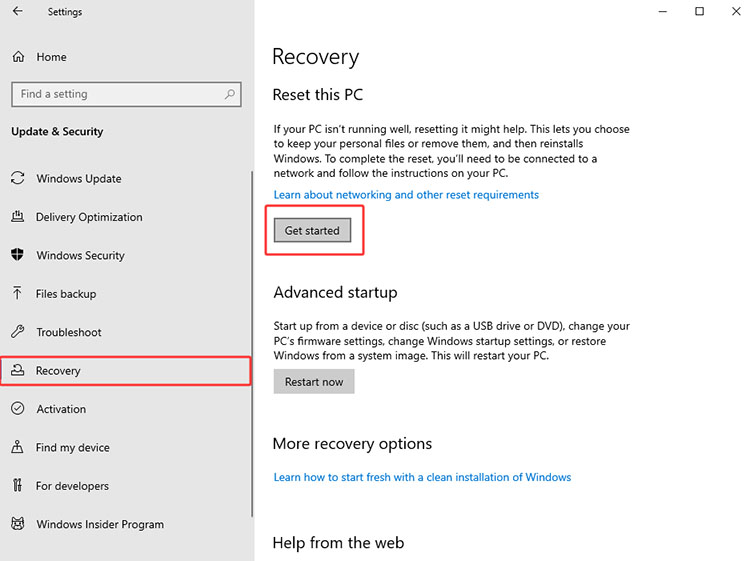
Step 2. Follow the on-screen instructions and wait for the process to finish. After the reset, the driver verifier DMA violation error should be fully resolved.
Final Thoughts
The driver verifier DMA violation is a common blue screen error caused by multiple factors. By now, you should be familiar with the 8 effective methods to resolve it. Since outdated or faulty drivers are the most frequent cause, Driver Booster is one of the most reliable solutions. There’s no need to update drivers manually; the software can automatically scan, update, and repair drivers to prevent future blue screen issues. Download the best driver scanner and updater, Driver Booster to keep your PC running smoothly now!