Many users are searching for ways to uninstall OpenClaw to fix a corrupted installation that's causing system errors or simply to clean up their system. Beyond removing this specific AI framework, understanding general system maintenance practices can help you keep your entire computer running smoothly.
This comprehensive guide covers everything about how to completely uninstall OpenClaw on Windows, macOS, and Linux. We'll walk through each platform's approach so you can choose the method that works best for your situation, while also sharing valuable tips that apply to software removal in general.
What Is OpenClaw?
OpenClaw is an open-source AI agent orchestration framework that runs locally on your devices. It connects to popular messaging platforms including WhatsApp, Telegram, Slack, Discord, and Signal while keeping your data private—all agent data is stored locally in an SQLite database.
The framework includes features like streaming AI responses, browser automation, vision capabilities, and voice integrations. OpenClaw operates through a local Gateway service and a command-line interface for management and configuration, supporting 12+ messaging platforms with extensive customization options.
Before You Uninstall OpenClaw - Do These Things!
Before diving into the uninstall OpenClaw process, taking a few precautionary steps will ensure a smooth removal experience and prevent accidental data loss that you might regret later. Preparation is key to avoiding common pitfalls during uninstallation:
Back up your configuration data: If you plan to reinstall later, back up your configuration directory. On macOS and Linux, this is ~/.openclaw/; on Windows, it's %USERPROFILE%\.openclaw\. This preserves your API keys, agent configurations, and conversation histories. Copy this folder to a safe location like an external drive or cloud storage before proceeding.
Stop all running processes and use the official uninstaller: Before uninstalling, stop the Gateway service using openclaw gateway stop and openclaw daemon stop. For the actual removal, OpenClaw provides a built-in uninstaller—run openclaw uninstall to automatically stop services, remove the CLI, and clean up files.
Decide on the removal scope: The CLI uninstall command removes the program but typically preserves your configuration directory. For a complete removal and to uninstall OpenClaw fully, you'll need to manually delete the state directory after uninstallation. Consider whether you want to keep any conversation logs or configuration files for reference.
How to Uninstall OpenClaw on Windows
If you installed OpenClaw via npm on Windows, here's how to uninstall OpenClaw on Windows with a complete step-by-step approach.
Step 1: Stop the Scheduled Task and running processes
Open Windows PowerShell as Administrator. Remove the Scheduled Task that starts the gateway:
schtasks /Delete /F /TN "OpenClaw Gateway"
schtasks /Delete /F /TN "ClawdBot Gateway" 2>$null
schtasks /Delete /F /TN "MoltBot Gateway" 2>$null

Now stop any OpenClaw process still running:
Get-Process -Name "openclaw*" -ErrorAction SilentlyContinue | Stop-Process -Force
Get-Process -Name "node" -ErrorAction SilentlyContinue | Where-Object { $_.Path -match "openclaw|clawdbot|moltbot" } | Stop-Process -Force

Step 2: Use the built-in uninstall command (if the CLI still works)
If the openclaw command is still available, use the built-in uninstaller first:
openclaw uninstall --all --yes --non-interactive
Step 3: Uninstall the CLI package
npm uninstall -g openclaw
Step 4: Verify the uninstallation
Get-Command openclaw -ErrorAction SilentlyContinue
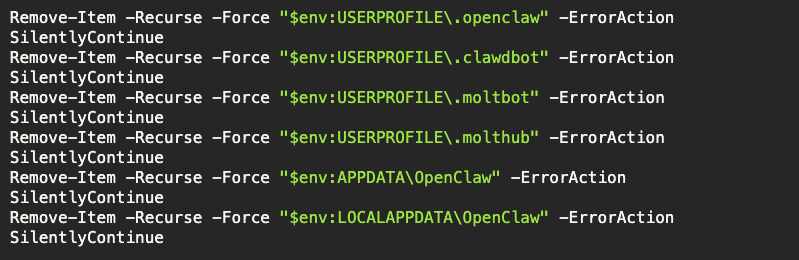
Step 5: Delete local state, legacy folders, and AppData leftovers
Remove-Item -Recurse -Force "$env:USERPROFILE\.openclaw" -ErrorAction SilentlyContinue
Remove-Item -Recurse -Force "$env:USERPROFILE\.clawdbot" -ErrorAction SilentlyContinue
Remove-Item -Recurse -Force "$env:USERPROFILE\.moltbot" -ErrorAction SilentlyContinue
Remove-Item -Recurse -Force "$env:USERPROFILE\.molthub" -ErrorAction SilentlyContinue
Remove-Item -Recurse -Force "$env:APPDATA\OpenClaw" -ErrorAction SilentlyContinue
Remove-Item -Recurse -Force "$env:LOCALAPPDATA\OpenClaw" -ErrorAction SilentlyContinue
Step 6: Remove Docker resources if you used Docker
docker compose down --volumes --remove-orphansdocker rmi openclaw/openclaw:latest 2>$null
Step 7: Verify that OpenClaw is fully removed
where openclawschtasks /Query /TN "OpenClaw Gateway" 2>$nullTest-Path "$env:USERPROFILE\.openclaw"netstat -ano | findstr :18789
If you're wondering how do I remove OpenClaw, these manual cleanup steps ensure no residual files remain.
How to Completely Uninstall OpenClaw via App Uninstallation
For Windows users who prefer a visual approach, IObit Uninstaller provides a powerful free solution to completely remove integrated applications that contain OpenClaw. This tool goes far beyond Windows' built-in uninstaller by scanning for and eliminating leftover files, registry entries, and system service remnants that standard removal leaves behind.
With over 26 million downloads worldwide, IObit Uninstaller has established itself as a trusted utility for thorough software removal. Beyond uninstalling desktop programs, it can also remove Chrome extensions and other browser add-ons.
IObit Uninstaller Free
- Complete forced uninstallation for stubborn programs.
- Uninstall a batch of programs at once.
- Scan and remove leftover files, folders, and registry entries.
- Support the management of Universal Windows Platform apps.
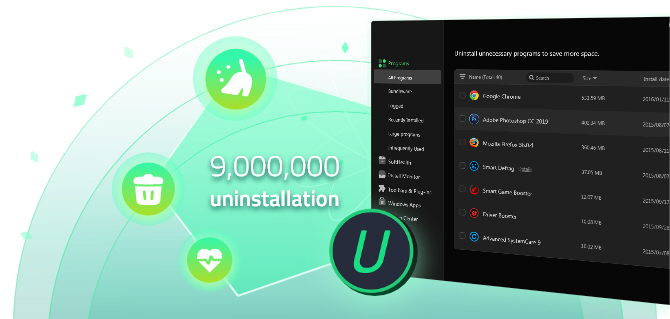
Here's a Step-by-Step Guide with IObit Uninstaller:
Step 1: Free Download and Install
Download IObit Uninstaller and install it on your PC.
Step 2: Find the Application
Launch IObit Uninstaller and browse the list of installed programs. Locate the application that contains OpenClaw—this could be a messaging platform integration, development environment, or the OpenClaw package itself. Use the search box to quickly find the target application.
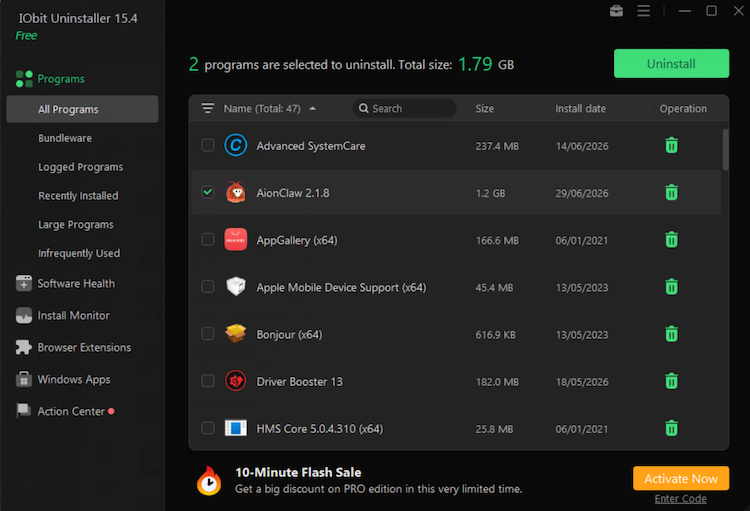
Step 3: Initiate the Uninstall with Residual Cleanup
Select the application and click the "Uninstall" button. A confirmation dialog will appear with two key options designed to ensure a safe and thorough removal:
Create a restore point before uninstalling: Create a system restore point, allowing you to revert your system if any unexpected issues occur.
Automatically remove residual files: When checked, IObit will automatically clean up all leftover files, folders, and registry entries immediately after the main program is uninstalled—no manual scanning or extra clicks required.
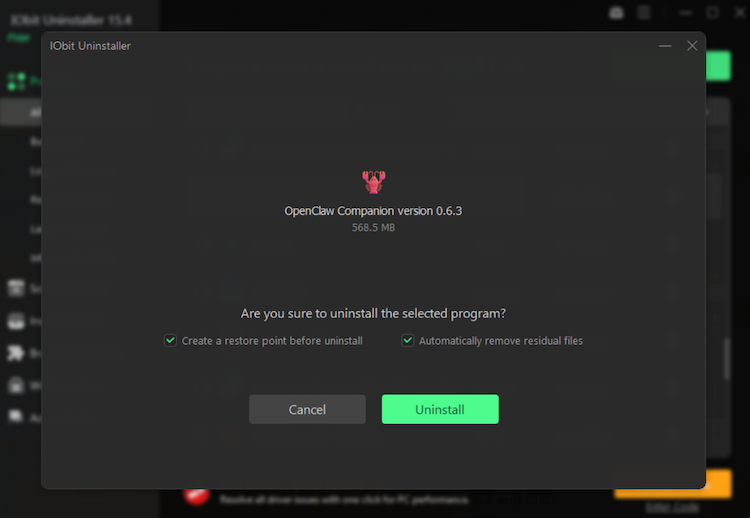
Check both boxes for the best results, then click the "Uninstall" button. IObit will first run the program's built-in uninstaller to remove the core application, then seamlessly handle the residual cleanup in the background.
This automated two-step process ensures that no traces of OpenClaw remain, which not only helps you free up disk space but also prevents potential system conflicts and registry bloat that could slow down your PC over time.
Step 4: Reinstall the App from Official Sources
If you still need the application, download the latest version directly from the publisher's official website. This ensures you receive a clean, up-to-date version without bundled unwanted software.
What Can You Benefit from IObit Uninstaller?
Clean Uninstall by 1 Click: IObit completely removes OpenClaw along with any integrated messaging apps. IObit’s McAfee removal tool Windows offers a broader solution for antivirus cleanup.
Batch Programs/Apps Uninstall: You can select multiple programs and uninstall them all at once, saving time and effort during system cleanup.
Browser Extensions Removal: It helps you remove Chrome extensions, as well as add-ons for Firefox, Edge, and other browsers.
Auto Monitor for Program Installations: Automatically logs every program installation, tracking files and registry changes for thorough future removals.
How to Uninstall OpenClaw on macOS
To uninstall OpenClaw completely on macOS, follow this comprehensive step-by-step guide that covers the npm package, LaunchAgent, and legacy service files.
Step 1: Stop the OpenClaw background service
If the CLI still works, stop it cleanly first:
openclaw gateway stopopenclaw daemon stop
Then use launchctl to remove the service. Default label is ai.openclaw.gateway:
launchctl bootout gui/$UID/ai.openclaw.gateway 2>/dev/null
Also remove legacy labels if present:
launchctl bootout gui/$UID/com.openclaw.gateway 2>/dev/nulllaunchctl bootout gui/$UID/bot.molt.gateway 2>/dev/null
Kill any leftover processes:
pkill -f openclaw || truepkill -f clawdbot || truepkill -f moltbot || true
Step 2: Use the built-in uninstall command (if the CLI still works)
openclaw uninstall --all --yes --non-interactive
Step 3: Remove LaunchAgent files manually
rm -f ~/Library/LaunchAgents/com.openclaw.gateway.plist
rm -f ~/Library/LaunchAgents/com.clawdbot.gateway.plist
rm -f ~/Library/LaunchAgents/bot.molt.gateway.plist

Confirm nothing is still loaded:
launchctl list | grep -i "claw\|molt"
Step 4: Remove the OpenClaw app
rm -rf /Applications/OpenClaw.app
Step 5: Delete configuration and legacy folders
rm -rf ~/.openclaw
rm -rf ~/.clawdbot
rm -rf ~/.moltbot
rm -rf ~/.molthub
If you set OPENCLAW_CONFIG_PATH to a custom location, delete that too:
echo $OPENCLAW_CONFIG_PATHrm -rf "$OPENCLAW_CONFIG_PATH"
Step 6: Remove the global CLI package
npm uninstall -g openclaw
Step 7: Remove Docker resources if you used Docker
docker compose down --volumes --remove-orphans
docker rmi openclaw/openclaw:latest 2>/dev/null || true
docker ps -a | grep -i claw
docker volume ls | grep -i claw

Step 8: Verify that OpenClaw is fully removed
which openclaw
lsof -i :18789
ls ~/.openclaw 2>/dev/null
launchctl list | grep -i "claw\|molt"
You May Like: How to Uninstall Applications on Windows 11 [Complete Guide] >>
How to Uninstall OpenClaw on Linux
The approach for how to uninstall OpenClaw on Linux follows a similar pattern, with extra attention to systemd services and legacy names.
Step 1: Stop the OpenClaw process
If the CLI still works, stop it cleanly:
openclaw gateway stop
If the command is not available, kill it manually:
pkill -f "openclaw gateway"
pkill -f openclaw || true
pkill -f clawdbot || true
pkill -f moltbot || true

Step 2: Use the built-in uninstall command (if the CLI still works)
openclaw uninstall --all --yes --non-interactive
Step 3: Disable and remove the systemd service
systemctl --user disable --now openclaw-gateway.service
rm -f ~/.config/systemd/user/openclaw-gateway.service
systemctl --user daemon-reload

Remove legacy service names:
systemctl --user disable --now clawdbot-gateway.service 2>/dev/null
systemctl --user disable --now moltbot-gateway.service 2>/dev/null
rm -f ~/.config/systemd/user/clawdbot-gateway.service
rm -f ~/.config/systemd/user/moltbot-gateway.service
systemctl --user daemon-reload

Step 4: Remove the CLI package
npm uninstall -g openclaw
Step 5: Verify uninstallation
which openclawnpm list -g --depth=0
Step 6: Delete local state, config, and legacy folders
rm -rf ~/.openclaw
rm -rf ~/.clawdbot
rm -rf ~/.moltbot
rm -rf ~/.molthub
If you set OPENCLAW_CONFIG_PATH to a custom location, delete that too:
echo $OPENCLAW_CONFIG_PATH
Step 7: Remove Docker resources if you used Docker
docker compose down --volumes --remove-orphans
docker rmi openclaw/openclaw:latest 2>/dev/null || true
Step 8: Verify that OpenClaw is fully removed
systemctl --user status openclaw-gateway.service
which openclaw
ls ~/.openclaw 2>/dev/null
lsof -i :18789
Verify If You Get a Clean Removal of OpenClaw
After completing the uninstallation steps, verifying that you've achieved a genuinely clean removal is essential to confirm success. Performing these checks takes only a few minutes but provides peace of mind:
CLI command is completely gone: On macOS/Linux, which openclaw returns nothing. On Windows, Get-Command openclaw -ErrorAction SilentlyContinue produces no output. If either shows a file path, the uninstallation was incomplete.
Configuration directory has been deleted: The ~/.openclaw directory (or %USERPROFILE%\.openclaw on Windows) no longer exists. This confirms all settings, API keys, and conversation logs have been erased.
Gateway service is stopped: No OpenClaw processes appear in ps aux | grep openclaw (macOS/Linux) or Task Manager (Windows). If you see any, force-stop them and check for auto-start entries.
No npm global package remains: npm list -g openclaw reports the package is not installed. npm sometimes silently fails if there are permission issues, so this verification is particularly important.
How to Reinstall OpenClaw If Needed (Fastest Way)
If you decide to reinstall OpenClaw after uninstalling, use the official installation scripts for the quickest setup. The OpenClaw team provides purpose-built scripts that handle all dependency management and environment configuration automatically:
bash
curl -fsSL https://openclaw.ai/install.sh | bash
This single command downloads the script, verifies its integrity, and executes it. The script automatically detects your OS, installs dependencies, and configures the Gateway service. After completion, run OpenClaw onboard to configure your messaging channels.
powershell
iwr -useb https://openclaw.ai/install.ps1 | iex
This downloads and executes the script, handling the complete installation including Node.js detection if needed. After completion, the openclaw command will be available in any new PowerShell session.
Final Thoughts
How to uninstall OpenClaw fully? This guide covers all methods to uninstall OpenClaw on Windows, macOS, and Linux. IObit Uninstaller excels at removing integrated apps and leftover files, ensuring a clean system. It also helps remove Chrome extensions and manage software clutter. Download IObit Uninstaller today for a cleaner PC!
IObit Uninstaller Free
- Complete forced uninstallation for stubborn programs.
- Uninstall a batch of programs at once.
- Scan and remove leftover files, folders, and registry entries.
- Support the management of Universal Windows Platform apps.