You are in the middle of an intense match, and your Razer mouse suddenly starts lagging or skipping clicks. In addition, you might find your headset cuts out mid-call, Synapse fails to detect your keyboard, or your gaming laptop begins acting up with unexpected freezes.
These frustrations are often caused by outdated or incompatible drivers. So, how to update Razer drivers? This complete guide will cover everything you need to know. Just read on to find useful Razer driver update methods to restore smooth communication between your hardware and computer.
Why Razer Driver Updates Actually Matter
Drivers serve as translators between your Razer hardware and the operating system. It’s crucial to keep them updated to improve device compatibility, stability, performance, and access to the latest features.
Here are the common signs that you may need a Razer driver update:
Mouse or keyboard with input lag, missed clicks, or erratic behavior.
Headset audio dropouts, missing spatial sound, or unrecognized devices.
Synapse fails to detect hardware or shows incomplete features.
Unexpected crashes, freezes, or reduced performance during games.
If you’ve encountered any of the signs above, it’s time to find the right fix. Let’s take a look at how to update Razer drivers and troubleshoot these common issues.
Can I Update Razer Drivers with Razer Synapse 4?
Razer Synapse 4 is Razer’s unified software for configuring and managing compatible gaming peripherals. It lets you customize buttons, macros, lighting, and other device settings. However, Synapse 4 mainly supports firmware updates rather than traditional driver updates.
If you need a specific driver or firmware updater, visit Razer’s official Support website and search for your exact device. For example, you can search for a driver for Razer DeathAdder, a Razer Basilisk Ultimate driver update, or a Razer Viper Mini driver update. Alternatively, you may go with Windows Update to find and install compatible Razer drivers, which we will introduce in the next part.
How to Update Razer Drivers Through Windows Update
Windows Update may automatically install compatible hardware drivers, especially when Microsoft or the hardware manufacturer distributes the update through Windows. It’s a convenient option if you want Windows to handle your driver management.
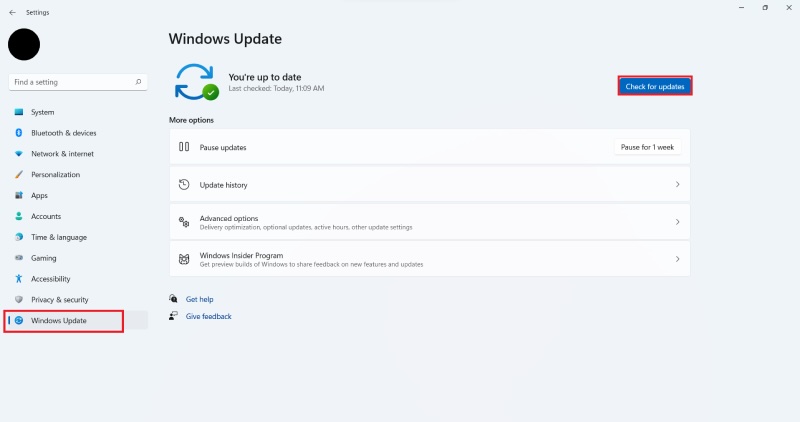
Step 1. Search for Settings and open it, then select Windows Update. Click Check for updates and allow Windows to download and install available updates.
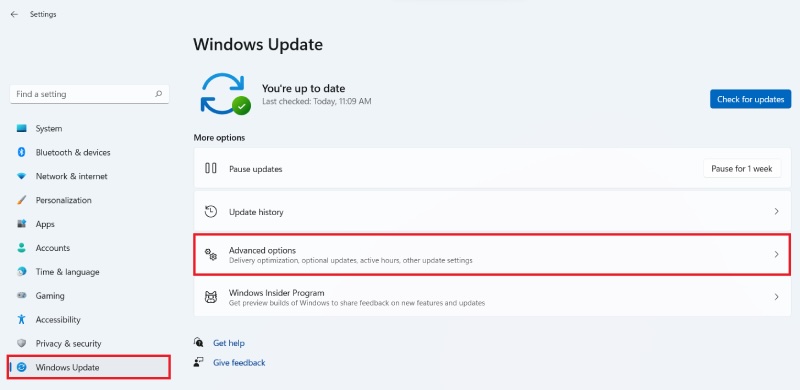
Step 2. On the same menu, go to Advanced options > View optional updates for available driver updates.
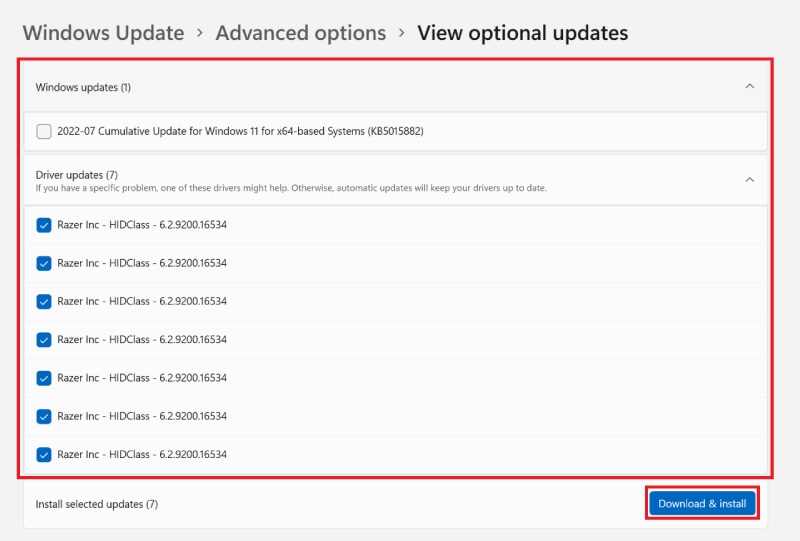
Step 3. If you see a relevant driver for your Razer device or its supporting hardware, select it and click Download & install.
Important clarification: Windows Update may not always provide the latest Razer-specific driver or firmware package. If you need a device-specific update, for example, a Razer Cortex driver update, it’s generally better to check Razer’s official support resources first. But when Windows Update cannot resolve the issue, don’t worry; just read on to find an effective workaround!
Smarter Way for Razer Driver Update - Use Driver Booster
While you can manage Razer driver updates manually, it can be time-consuming to manage every driver on a gaming PC, for instance, graphics, chipset, audio, network, and multiple peripherals. What’s more, you cannot ensure the drivers are the latest versions. That’s where IObit Driver Booster comes into play, which allows you to manage driver updates efficiently.
Driver Booster Free
- Automatically scan and update drivers.
- Update game ready drivers for peak gaming performance.
- Identify and fix various common of hardware issues.
- Boost 30% of system performance for fast & smooth running.
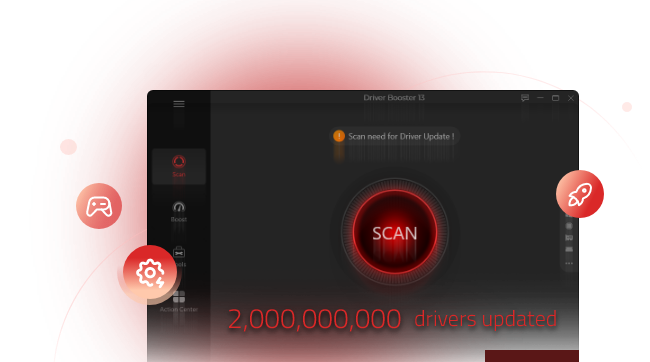
This driver updater can scan your system, identify outdated or missing drivers, and help you update multiple components without manual effort. This can be especially useful for gamers with multiple peripherals (mice, keyboards, headsets, etc.) or users with high-performance gaming PCs and laptops. It’s also the best software that supports ASUS/Lenovo driver update.
Why Driver Booster is the Best for Razer Driver Updates?
It detects outdated, missing, or faulty drivers across your system in seconds and updates them with one click. It’s the best automatic driver updater for fast and reliable results.
There is no need to switch between different tools. Driver Booster can handle Razer peripherals plus graphics, audio, network, and chipset drivers together, saving you so much time and effort.
It delivers manufacturer-certified and game-ready drivers that boost responsiveness and overall performance. You can also update MSI driver with it for a more reliable experience.
What makes it even more outstanding is that it lets you create a restore point before installing any driver, so you can have a safe way to roll back if any problem arises with the new Razer driver update.
Designed with a simple interface, it allows any average user to update drivers quickly. If you want to make a Razer driver update with minimal effort, Driver Booster can be your simplest solution.
How to update Razer drivers in simple steps:
Step 1. Download and install Driver Booster on your Windows PC for free.
Step 2. Launch the program. Click the big Scan button to scan for Razer drivers that need to be updated.
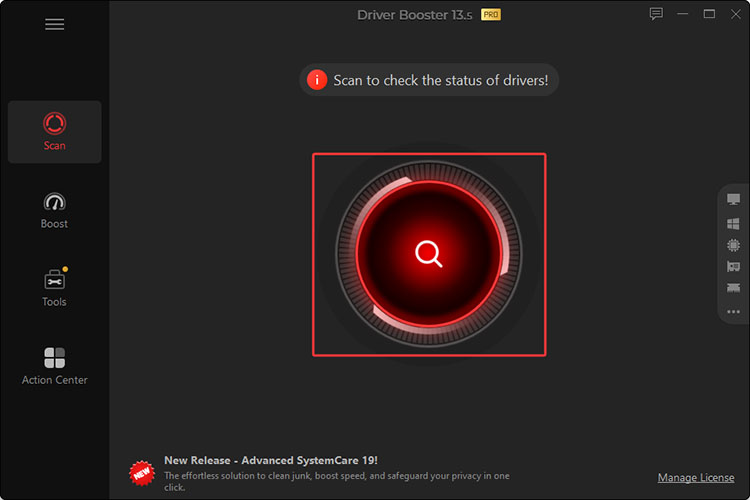
Step 3. Select and update the Razer drivers, for instance, the driver for Razer DeathAdder.
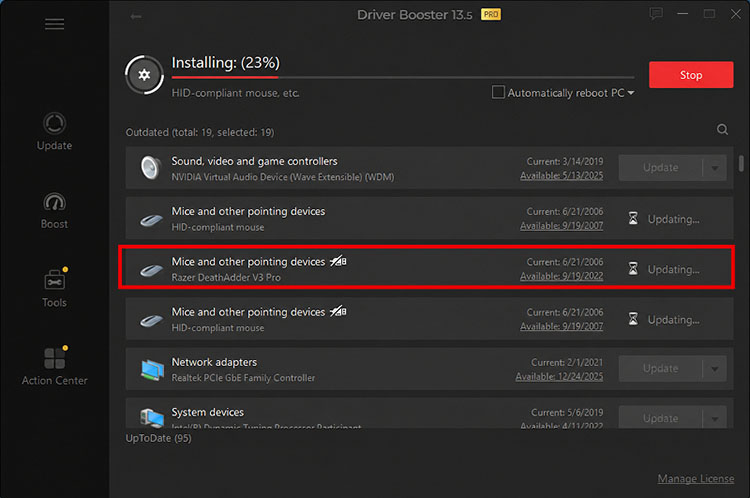
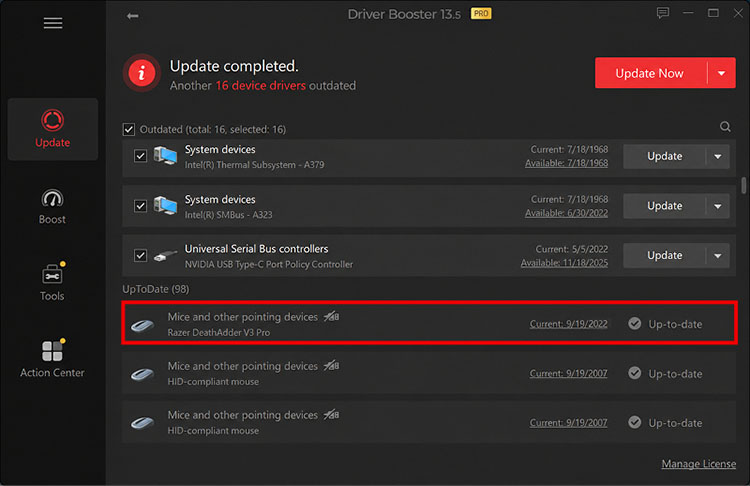
Step 4. After a few minutes, your Razer drivers will be updated to the latest version.
 Tip: Driver Booster supports a wide range of hardware drivers. You can also improve your gaming experience with it. Check out how to fix lag in Roblox to learn more.
Bonus Tip: How to Download and Update Razer Firmware
Aside from Razer driver updates, it’s crucial to keep your device firmware up to date. Firmware controls core device functions, and updates can fix connectivity issues, improve wireless stability, resolve sleep-related problems, and enhance overall reliability.
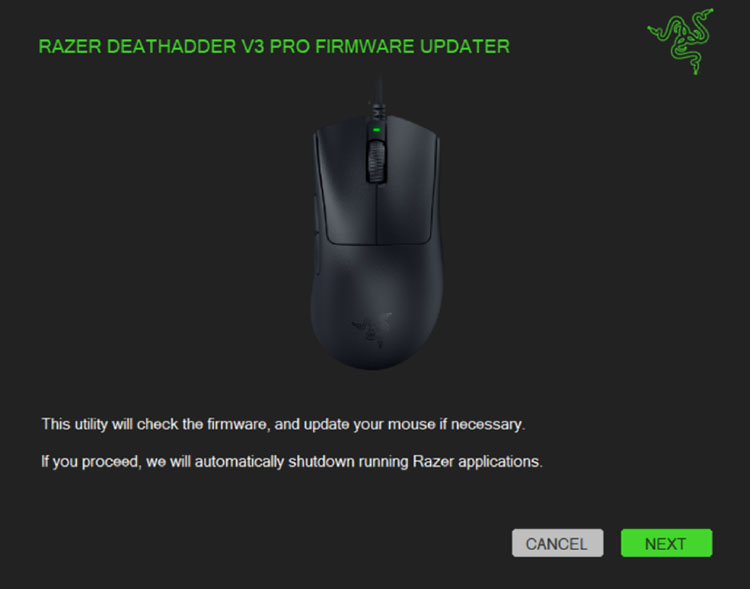
Here will use DeathAdder V3 Pro as an example:
Step 1. Visit the official Razer Support page and download the dedicated firmware updater for your exact model.
Step 2. Run the updater as administrator, accept the User Account Control prompt, and click NEXT so it can close any running Razer applications.
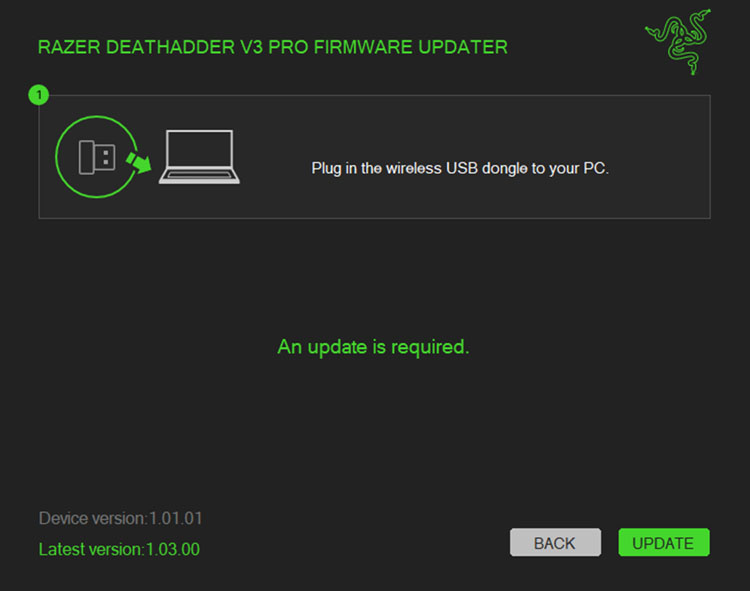
Step 3. Select your device, plug in the wireless USB dongle, and click UPDATE. Wait for the dongle update to finish without interrupting it.
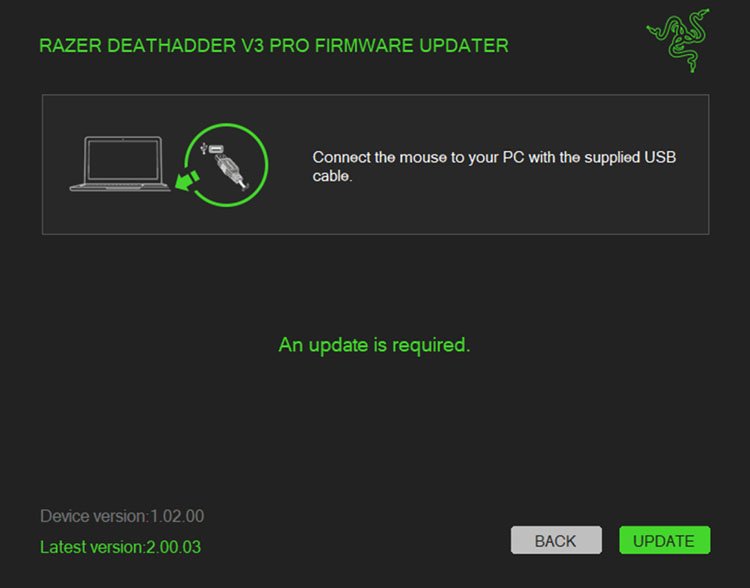
Step 4. Connect the mouse to the PC with the supplied USB cable, click UPDATE again, and wait for the process to complete. Click CLOSE once the update is complete.
The Bottom Line
Outdated drivers can quietly undermine even the best Razer gear. But with the methods above, you can keep your Razer devices up to date with ease. As you can see, Driver Booster is a convenient, all-in-one solution with a large driver database covering Windows and a wide range of hardware, including drivers that support your Razer devices. You can make a Razer driver update with it in just a few clicks. Get Driver Booster and enjoy better stability and a more reliable gaming experience with minimal effort now!