- Support Center
- Multiple Languages
- Language
- Help Us Translate
Expert in
PC Health Solution

All-in-one PC health solution: clean, optimize and secure

Comprehensive PC cleaning, optimization and protection

Keep drivers always up-to-date

More stable performance with less system crashes

Protect millions of computers against malware

Top computer security with full-round protection

Protect against viruses & boost PC performance
Automatically scan and update drivers.
Update game ready drivers for peak gaming performance.
Identify and fix various common of hardware issues.
Boost 30% of system performance for fast & smooth running.

Want to upgrade to Windows 11, but TPM 2.0 isn't enabled? Check out our easy guide to enable TPM 2.0 on all compatible PCs.



What is TPM 2.0?
How to Check If Your PC Has TPM 2.0?
How to Enable TPM 2.0 on Your PC?
Update the TPM 2.0 Driver
Why Choose Driver Booster?
You’re using Windows 10 and want to upgrade to Windows 11, but there’s a stumbling block: TPM 2.0 isn’t enabled—or worse, you don’t even know what it is. Don’t panic! You can’t upgrade to Windows 11 without this security chip enabled. This guide explains how to enable TPM 2.0, even if you’re a beginner, with simple steps to check and activate it on Windows 10 or 11 with total peace of mind.
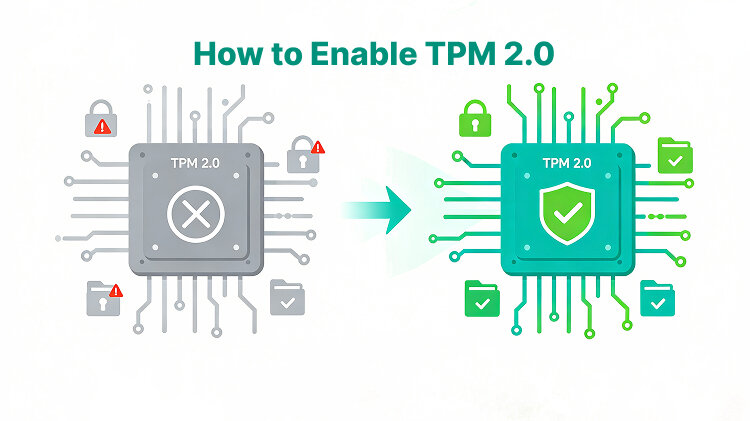
TPM, or Trusted Platform Module, is a small security chip built directly into your computer's motherboard. Its role? To protect your sensitive data, enhance system security, and ensure system integrity (particularly during startup).
The good news: most computers manufactured after 2016 generally come equipped with TPM version 2.0, the version required for Windows 11.
The TPM is a chip built directly into your computer's motherboard. If your machine was manufactured within the last nine years, there is a good chance it is equipped with one.
To check for it on a Windows 10 PC via Windows Security:
Click Start > Settings
Go to Update & Security. Click Windows Security, then Device security
If your PC has a TPM, a section called "Security processor" will appear
If you cannot access the Security processor screen, your computer does not have a TPM.
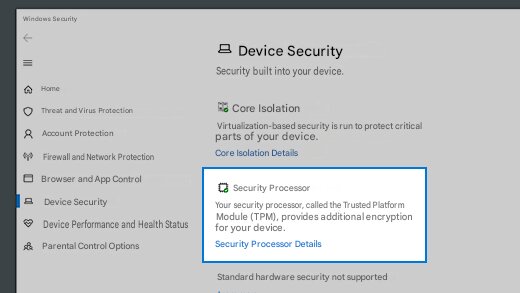
You can also check the TPM version using the TPM management console:
Press the Windows + R keys on your keyboard
In the window that opens, type tpm.msc and press Enter
A window named "Trusted Platform Module (TPM) Management" will open
Look at the "TPM Manufacturer Information" section: the version will be displayed at the bottom
If you see TPM version 2.0, your PC is compatible with Windows 11.
If your PC is not equipped with a TPM, or if it has a TPM but it is not enabled in the BIOS/UEFI, you will see the message: Compatible Trusted Platform Module not found
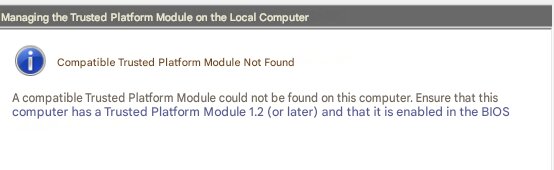
With these prepared, you can now check how to activate TPM 2.0 in BIOS below.
If the message "Compatible Trusted Platform Module cannot be found" appears, it means the TPM is disabled or not detected by Windows. To know how to enable TPM 2.0, follow the steps below.
1. Restart your computer.
2. As soon as it restarts, repeatedly press the Del, F2, F10, or Esc key (depending on your PC brand) to access the BIOS/UEFI.
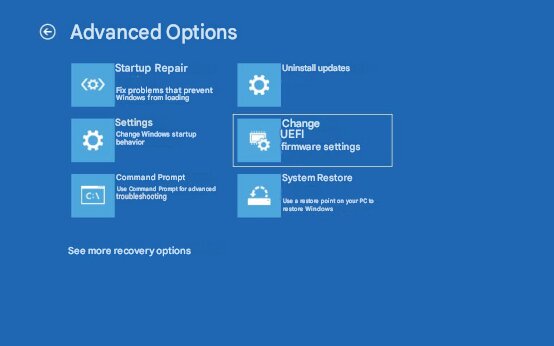
3. Once in the BIOS, look for a section named Security or Advanced.
4. Locate the TPM, fTPM (for AMD), or PTT (for Intel) option.
5. Enable this option.
6. Save the changes (usually by pressing F10) and restart the PC.
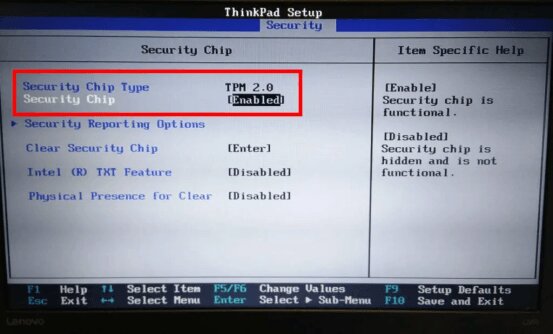
After restarting, you can run the tpm.msc command again to verify that TPM 2.0 is indeed enabled. This is how you enable TPM 2.0 on your PC.
*Tip: If your PC stuck on boot screen, check the tutorial here to fix it.
Once TPM 2.0 is enabled in the BIOS, it is highly recommended to update its driver in Windows. An outdated driver can prevent Windows 11 from correctly recognizing the module, or even trigger error messages such as "TPM not found" or "This PC can't run Windows 11," even after activation.
Here is how to do it manually:
Right-click the Start button and open Device Manager.
Expand the Security devices section.
Right-click Trusted Platform Module 2.0, then select Update driver.
Choose Search automatically for drivers.
Click Search for updated drivers on Windows Update.
Click the Check for updates button.
Click View optional updates.
Select the TPM module driver from the Driver Update list, then click Download and install.
If you wish to automate the search and installation of all critical drivers (including TPM, chipset, graphics card, etc.), we recommend using Driver Booster.
Also Read: PC Sound Not Working? Can I Uninstall and Reinstall Realtek Audio Driver to Solve it and How? >>
Driver Booster is free software designed to:
Detect missing, outdated, or faulty drivers
Automatically update essential drivers (TPM, BIOS, GPU, etc.)
Back up your drivers before every update (for safety)
Optimize overall system performance, especially before a major upgrade like the one to Windows 11.
With just a few clicks, Driver Booster ensures your PC is up to date, stable, and ready for Windows 11—without stress or driver-related errors.
To enable TPM 2.0 might seem technical, but as you have seen, the steps are simple and accessible, even for beginners. By following this step-by-step guide, you can now check for the TPM module, enable it via the BIOS/UEFI, and ensure your computer is ready to safely upgrade to Windows 11.
 People Also Ask
My computer says my printer driver is unavailable. What to do next? Get a step-by-step guide to solve your problem effectively.
Why is my PC screen black? How to fix a black screen? What can I do as a normal person?
Why is Warzone so laggy on PC? How do you fix lag and stuttering in Warzone? Find out main reasons and get available fixes that help improve gaming performance.
From downloading to Safe Mode booting and clean restart – follow these 6 easy steps on how to use DDU and resolve persistent display driver problems.
Internet not working? Learn the top reasons and proven troubleshooting steps to fix no internet connection issues and get back online quickly.
Struggling with “why won't my GeForce driver update”? Learn why you can’t update NVIDIA driver and discover fixes for GeForce driver installation errors.