- Support Center
- Multiple Languages
- Language
- Help Us Translate
Expert in
PC Health Solution
All-in-one PC health solution: clean, optimize and secure
Comprehensive PC cleaning, optimization and protection
Keep drivers always up-to-date

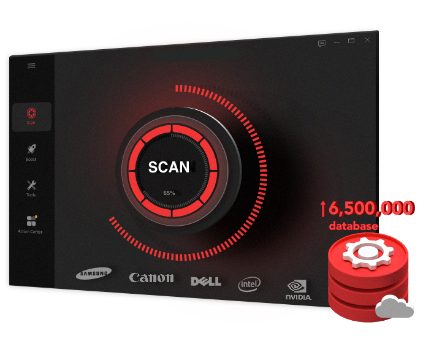
More stable performance with less system crashes
Protect millions of computers against malware

Top computer security with full-round protection
Protect against viruses & boost PC performance
Automatically scan and update drivers.
Update game ready drivers for peak gaming performance.
Identify and fix various common of hardware issues.
Boost 30% of system performance for fast & smooth running.

From downloading to Safe Mode booting and clean restart – follow these 6 easy steps on how to use DDU and resolve persistent display driver problems.


Step by Step: How to Use DDU in Safe Mode
Step 1. Download DDU and extract it to a local folder
Step 2. Boot your PC into Safe Mode
Step 3. Run DDU as administrator
Step 4. Select your GPU type (NVIDIA, AMD, or Intel)
Step 5. Choose a clean option
Step 6. Reinstall your GPU drivers
Display Driver Uninstaller helps completely remove GPU drivers when standard methods fail. This guide will show how to use DDU safely to fix driver conflicts and reinstall clean drivers on Windows 10 and 11.
Display Driver Uninstaller (DDU) is a specialized tool that completely removes graphics drivers (NVIDIA, AMD, and Intel) and related components from your Windows system. Unlike standard uninstallation, it deletes leftover files, registry entries, and driver store data to ensure a clean reinstall.
DDU is a troubleshooting tool, not meant for routine driver updates. Use it if you’re dealing with the following issues:
GPU driver crashes or black screens
Failed or corrupted driver updates
Switching GPU brands (e.g., NVIDIA → AMD)
Persistent issues after a normal uninstall
Download the latest drivers from NVIDIA, AMD, or Intel so you can reinstall them right after cleanup.
Create a restore point to roll back your system if anything goes wrong.
Disable your internet connection to prevent Windows from automatically installing drivers.
Run DDU in Safe Mode to avoid conflicts with active driver processes.
Shut down unnecessary programs to minimize interference during the process.
Step 1. Download DDU
Download Display Driver Uninstaller from the official site (https://www.wagnardsoft.com/display-driver-uninstaller-ddu).
Step 2. Boot into Safe Mode
Click the Start menu and select the Power icon.
Hold down the Shift key and click Restart.
Your PC will reboot into a blue screen with options. Then select Troubleshoot > Advanced options > Startup Settings.
Click the Restart button located in the bottom-right corner.
Once your PC restarts again, you will see a numbered list. Press 4 or F4 on the keyboard to select Enable Safe Mode.
Step 3. Run DDU
Open the extracted folder and right-click on the file named Display Driver Uninstaller.exe.
From the context menu, select Run as administrator.
Step 4. Select Device Type
On the right side of the DDU window, locate the dropdown menu and choose your GPU manufacturer (NVIDIA, AMD, or Intel).
Step 5. Choose a Clean Option
On the left side of the window, click “Clean and restart” (recommended). DDU will remove all driver traces and automatically reboot your PC when finished.
Step 6. Reinstall Drivers
Open the driver installer you saved earlier, right-click it, and select Run as administrator to install your new drivers. Keep your internet disconnected during this step to prevent Windows from auto-installing drivers.
Tip: For a faster, more automated way to reinstall drivers after using DDU, tools like Driver Booster can help. It scans your system, identifies missing or outdated drivers, and installs compatible versions with minimal effort—ideal for a simpler setup.
Reconnect to the internet after driver installation.
Re-enable any settings you disabled earlier (e.g., Windows Update).
Verify the driver is installed correctly in Device Manager.
Perform one final reboot for a complete cleanup.
 People Also Ask
Yes. You can try 3 ways on how to uninstall the Realtek audio driver and reinstall it to solve the problem that PC sound is not working generally.
How to improve Steam download speed? Check how to make Steam download faster in 12 ways: Check Internet Connection, Switch Steam Download Server Region…
Free up disk space by safe Windows Installer folder cleanup. This guide shows how to use Settings, Disk Cleanup, etc., to remove unwanted installer files.