



Kevin Hart
Kevin is an experienced editor focused on tech blog writing. Familiar with all kinds of PC software on the market. All the topics he chooses are aimed at bringing more benefits to users.
Expert in
PC Health Solution

All-in-one PC health solution: clean, optimize and secure

Comprehensive PC cleaning, optimization and protection

Keep drivers always up-to-date

More stable performance with less system crashes

Protect millions of computers against malware

Top computer security with full-round protection

Protect against viruses & boost PC performance
Complete forced uninstallation for stubborn programs.
Uninstall a batch of programs at once.
Scan and remove leftover files, folders, and registry entries.
Support the management of Universal Windows Platform apps.

Want to learn how to uninstall G-Helper completely from your computer, check out the five methods in this guide to find the one that works best for you.

Kevin Hart


Are you also an ASUS laptop user? To manage your laptop's performance and system settings, you may have followed a guide and downloaded the control tool G-Helper—until you decided you no longer needed it. However, uninstalling it may not be as straightforward as removing a typical application.
This guide can be a reliable source for learning how to uninstall G-Helper, offering several methods for Windows, from simply deleting the program to cleaning up leftover configuration files. Keep reading and follow the steps to make G-Helper truly disappear from your computer.
I've already tried removing G-Helper from my computer, so why is it still there?
This may be exactly why you need a guide on how to uninstall G-Helper—many users have encountered similar issues. After researching and summarizing the common causes, these problems mainly come down to the following:
·Self-Defense Protection: As a control tool, G-Helper may continue running in the background and using system resources even after you appear to have deleted it. For example, after restarting your computer, the system may automatically launch it again.
·Deep Registry Ties: Launching and using G-Helper may leave related information, such as registry entries, in the Windows Registry. Uninstalling the main program does not necessarily mean these entries will be completely removed as well.
·Deep System Integration: As mentioned earlier, G-Helper can control the performance of ASUS laptops, including power consumption and fan settings. As a result, related configurations and services may remain on your system after the main program is removed.
·Permission Restrictions: Does your account have permission to delete G-Helper files? If not, Windows may restrict the operation and display an Access Denied message.
·Corrupted Installation Issues: You can uninstall G-Helper—provided that the program itself is intact. If its program files have been corrupted, the uninstallation process may fail to complete properly.
First, check whether G-Helper appears in your computer's Settings > Installed apps list. If it does, great—you can try the most basic system uninstallation method. (Since G-Helper is a portable tool, some users may not find it under Installed apps.)
Here is how to uninstall G-Helper through Windows Settings
Step 1. Find the G-Helper icon in the lower-right corner of your desktop taskbar, right-click it, and select Exit.
Step 2. Press Ctrl + Shift + Esc on your keyboard to open Task Manager. Then click Startup apps. If you can still find G-Helper in the list, right-click it and select Disable.
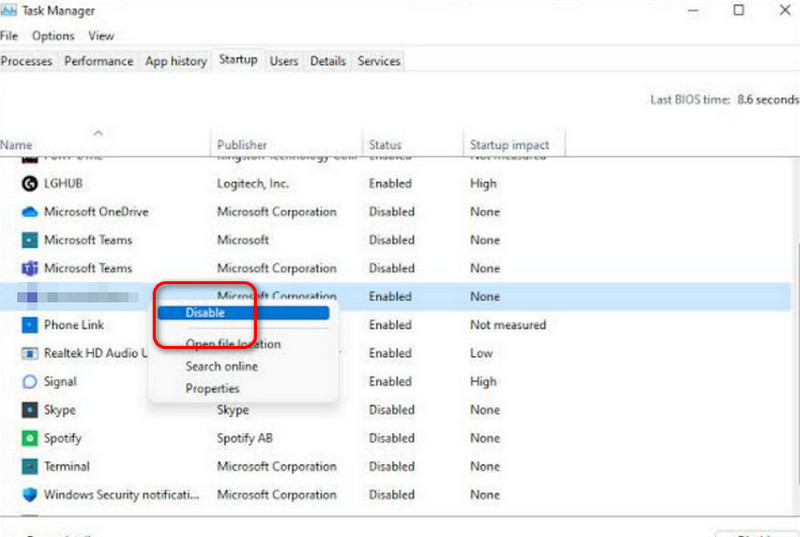
This will effectively prevent it from launching automatically again.
Step 3. Search your computer for the program file named GHelper.exe and delete it.
After the uninstallation is complete, restart your computer.
The traditional method doesn't seem to work completely for me. How do I delete G-Helper?
You may indeed encounter this situation. The default Windows uninstallation method may only remove the main program, while hidden registry entries, cache, and configuration files can remain behind and be difficult to locate or remove completely. If you want to solve the problem thoroughly, consider trying a professional third-party tool like IObit Uninstaller.
Once you select the software you want to remove, it can handle the entire process, from uninstalling the program to scanning for and cleaning up related leftovers, saving you from manually tracking everything down. It can also work with corrupted G-Helper program files.

Here's how its key features can help:
·One-click uninstall: Why jump through multiple pages? IObit Uninstaller says it's not necessary. Simply find G-Helper and click the uninstall button to start the entire cleanup process automatically.
·Deep cleans leftover files and registry entries: It doesn't stop at the main program. IObit Uninstaller also helps check for G-Helper-related leftovers, including related entries in the Windows Registry.
·Force uninstalls stubborn installations: Even if your G-Helper installation is corrupted, causing the normal uninstallation process to get stuck or fail, IObit Uninstaller's Force Uninstall can handle these stubborn issues.
Tips: IObit Uninstaller works for all kinds of force uninstall program Windows 11/10 tasks, so you can confidently use it to remove other software as well.
·Automatically scans for residual G-Helper traces: There's no need to check folders one by one. IObit Uninstaller can automatically scan for traces related to G-Helper and clean them up after the uninstallation.
Here is how to uninstall G-Helper using this best uninstaller for Windows 11.
Step 1. Download and install the software on your PC, then launch it.
Step 2. Select All Programs from the left sidebar and locate G-Helper in the program list.
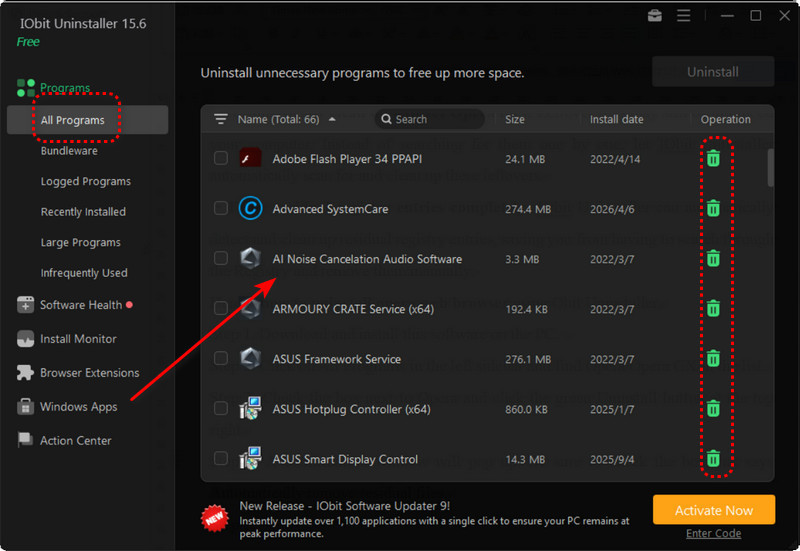
Step 3. Check the box next to G-Helper, then click the green Uninstall button in the right side.
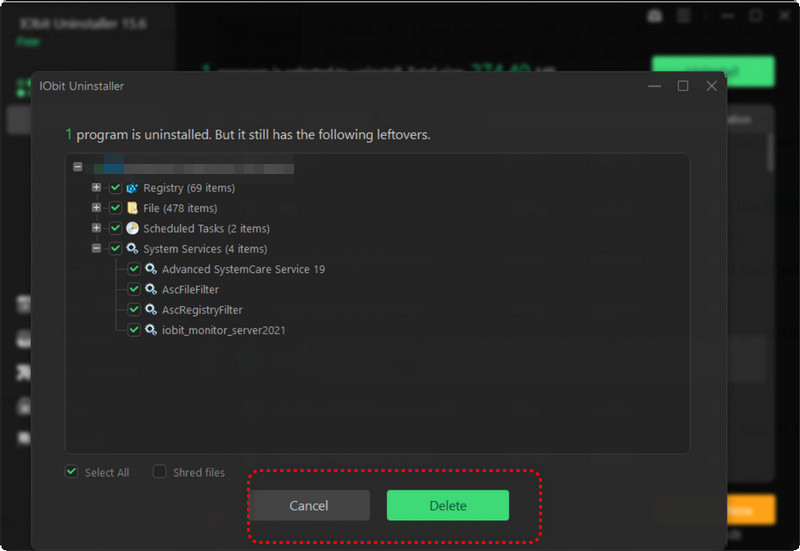
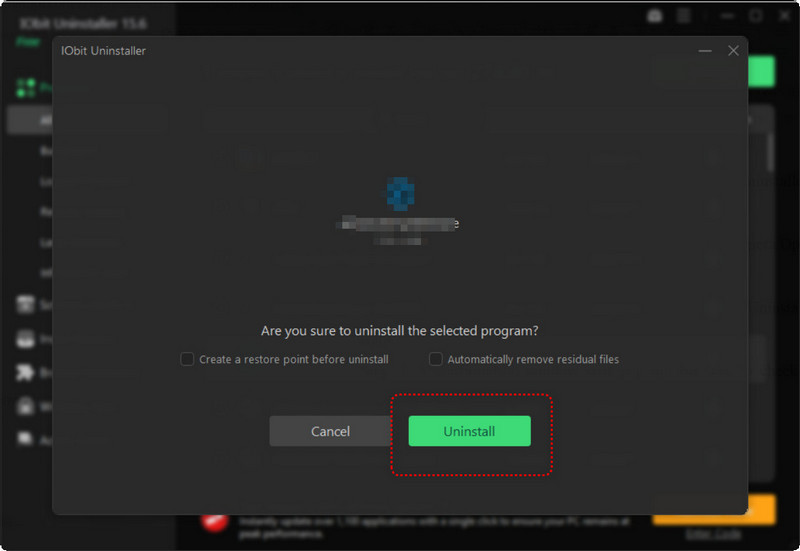
Step 4. When the confirmation window appears, make sure to select Automatically remove residual files before proceeding with the uninstallation.
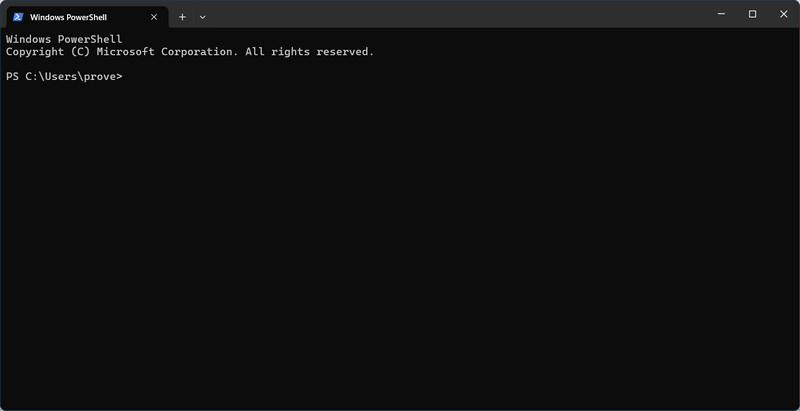
In fact, Windows also provides another code-based how to uninstall G-Helper method—using Windows PowerShell. This tool can be used to check related applications, processes, and startup items. Here's how to use it:
Step 1. Find Windows PowerShell through the system search box, right-click it, and select Run as administrator.
Step 2. Enter the following command in the window:
Get-Process | Where-Object {$_.Name -like "*GHelper*"}
Then press Enter.
Step 3. If you find that G-Helper is still running, enter:
Stop-Process -Name "GHelper" -Force
The G-Helper official documentation has mentioned that the app uses Windows Task Scheduler to create a task for startup, so even if you delete the GHelper.exe file, it may still attempt to launch.
In this case, an effective solution may be to check Task Scheduler and remove the startup task from there.
Here is how to do:
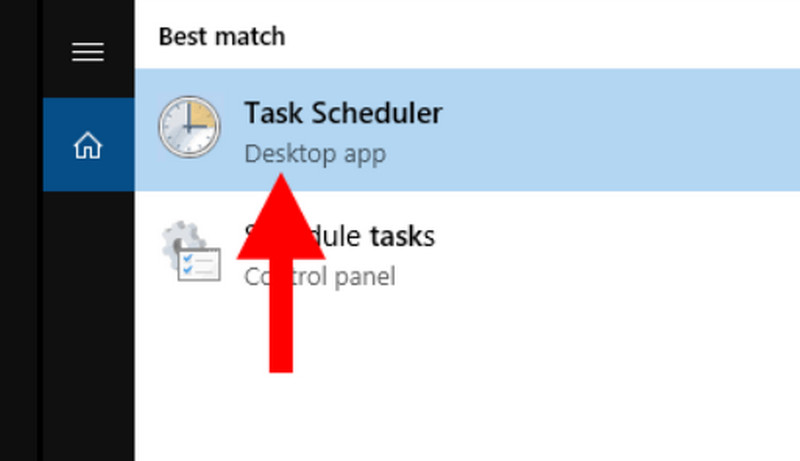
Step 1. Enter Task Scheduler in the Windows search box and open it.
Step 2. Select Task Scheduler Library on the left, then find the task named GHelper in the task list.
Step 3. Right-click GHelper, select Delete, and confirm the deletion.
Finally, restart your computer and check whether G-Helper no longer launches automatically.
If you have already deleted GHelper.exe, but your previous settings still appear after you uninstall and reinstall G-Helper, the configuration files may be what you really need to clean up.
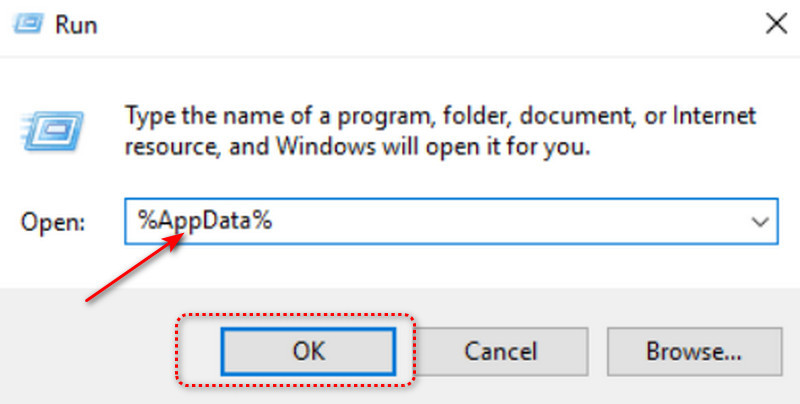
The configuration files can be found in %AppData%\GHelper, which you can access through the Windows Run window.
Here is how to do:
Step 1. Press Windows + R to open the Run window.
Step 2. Enter %AppData%\GHelper, and check the relevant folder for any remaining GHelper files.
Step 3. After confirming that you no longer need the saved configurations and logs, delete the GHelper folder.
Step 4. Press Windows + R again, enter C:\ProgramData\GHelper, and check whether any related backup configurations remain.
Finally, restart your computer.
Note: Deleting these files will remove configurations saved by G-Helper, such as custom performance modes. If you use G-Helper again later, you will need to configure these settings again.
The how to uninstall G-Helper methods provided locally by Windows, such as using Settings and PowerShell, can meet some of your basic needs. However, you may still be frustrated by complicated steps or incomplete cleanup. As a one-and-done alternative, using IObit Uninstaller for a one-click, forceful uninstall is undoubtedly a more time-saving and reliable option.
Moreover, if you're an ASUS user who is constantly switching between G-Helper and Armoury Crate, and often need to get G-Helper uninstall Armoury Crate or uninstall Armoury Crate and use G-Helper, IObit Uninstaller can help you complete the switch whenever needed.

Remove unwanted software easily.
Free Download