Windows, apps, browsers, and system processes regularly create temporary files for everyday tasks. When these files accumulate, they can consume valuable storage and leave your PC feeling sluggish. Fortunately, Windows provides several free ways to clean them up, including tools that make understanding how to delete temporary files in Windows simple and fast.

The Types of System Temporary Files
Temporary files are not a single category. Windows and the programs running on your PC create different temporary data for different tasks, and each type may be stored in a different location. Before deleting anything, knowing the types of system temporary files is helpful for learning how to delete temporary files in Windows 11/10.
System Temporary Files: Windows creates temporary files while installing software, processing tasks, and handling system operations. These built-in options are useful when learning how to delete temporary files in Windows without manually searching through system folders.
Application Temporary Files: Programs such as video editors, office software, and installers may create their own temporary files. Some are automatically removed when the application closes, while others can remain after a crash or interrupted task.
Browser Cache: Chrome, Edge, Firefox, and other browsers store cached images, scripts, and website data to speed up page loading. Clearing the cache can recover some disk space.
Windows Update Cache: Windows Update keeps downloaded installation files and related data in its cache. Old or incomplete update files can sometimes occupy considerable storage. On Windows 10, clean Windows update cache often involves using Storage or Disk Cleanup.
Temporary Internet Files: Temporary Internet files are cached website components stored by Windows or older applications for faster access. They are generally safe to clear when no longer needed.
How to Delete All Temporary Files in Windows 10/11
Cleaning temporary files manually means checking several folders and system locations one by one. IObit Advanced SystemCare offers a more centralized approach, scanning multiple types of junk data from one interface. Its Privacy Sweep and Junk File Clean features can identify and delete temporary files, caches, logs, and other unnecessary data in bulk, quickly, in a single click. Below is a detailed guide on how to delete temporary files in Windows 10/11 with IObit Advanced SystemCare.
How to Remove Temp Files with Advanced SystemCare?
Step 1. Free download and install IObit Advanced SystemCare on your Windows 10 or Windows 11 PC. Launch the program after installation.
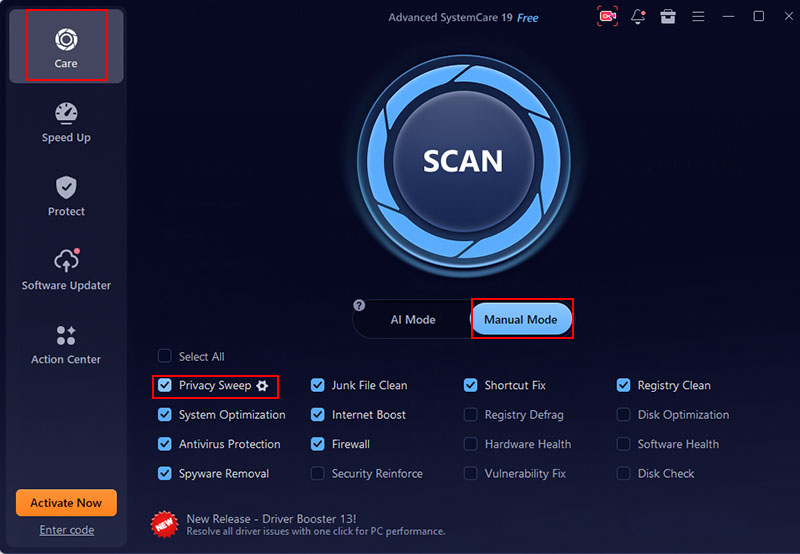
Step 2. Go to the Care section and switch to Manual Mode if necessary. Locate Privacy Sweep and open its settings to choose which categories should be scanned and removed.
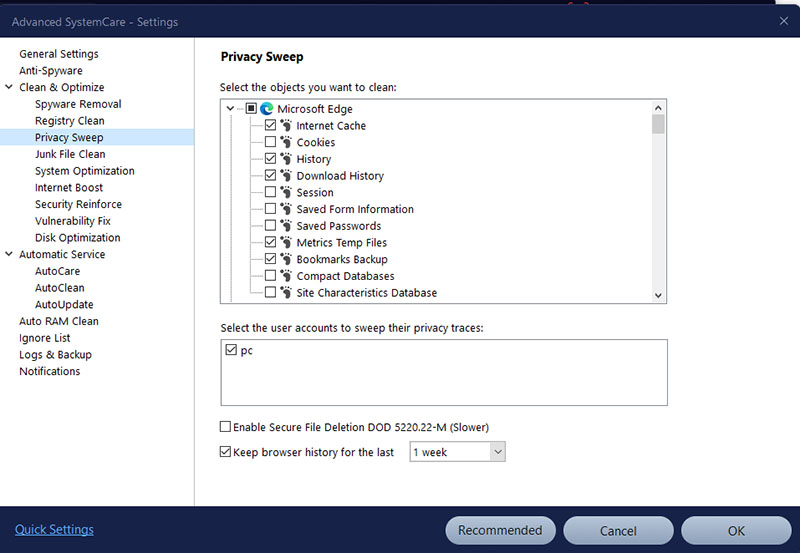
Step 3. Select cleanup categories on the Privacy Sweep settings window, such as temporary files, browser caches, download history, and other unnecessary data.
Step 4. Return to the main cleanup interface and click Scan. Review the detected files, then start the cleanup to remove the selected temporary files.
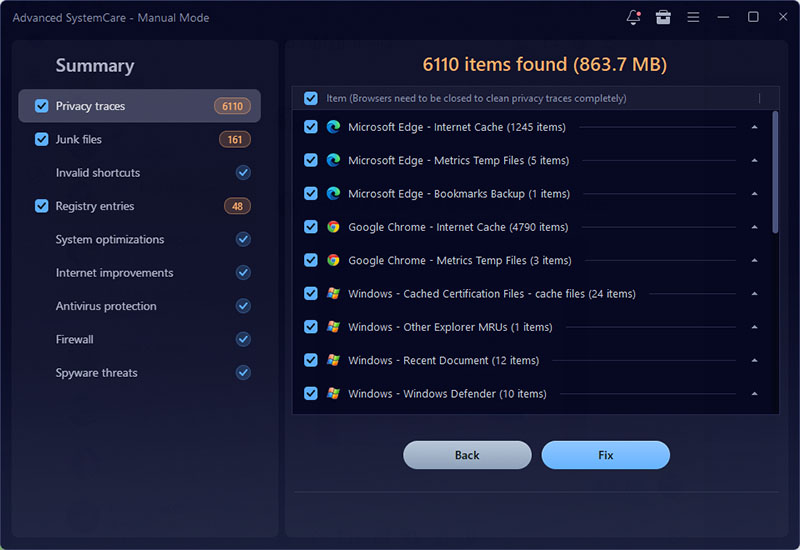
What Can IObit Advanced SystemCare Clean?
Junk Files & Temporary Files: It can detect temporary files, application leftovers, logs, error reports, and other redundant files that accumulate during normal Windows and software usage.
Browser Cache & Internet Traces: The tool can scan and remove browser cache, temporary web files, browsing history, cookies, and other stored browser data quickly in batch based on your preferences.
Windows System Cache & Logs: Advanced SystemCare can clean Windows temporary files, system logs, error reports, memory dump files, and other diagnostic data generated by Windows. These files can accumulate after system errors, updates, or routine operation.
Unused Registry Entries & Software Leftovers: The cleanup features identify certain obsolete registry entries associated with removed software, invalid file associations, obsolete startup entries, and leftover folders or files.
How to Delete Temporary Files in Windows: Browser Cache
Browser cache stores copies of images, scripts, and other website resources so frequently visited pages can load faster. A large or outdated cache can take up unnecessary disk space or occasionally cause website loading problems. Here’s how to delete temporary files in Windows by clearing your browser cache.
Step 1. Launch your browser and open its Settings menu. You can usually find the relevant options under Privacy and security.
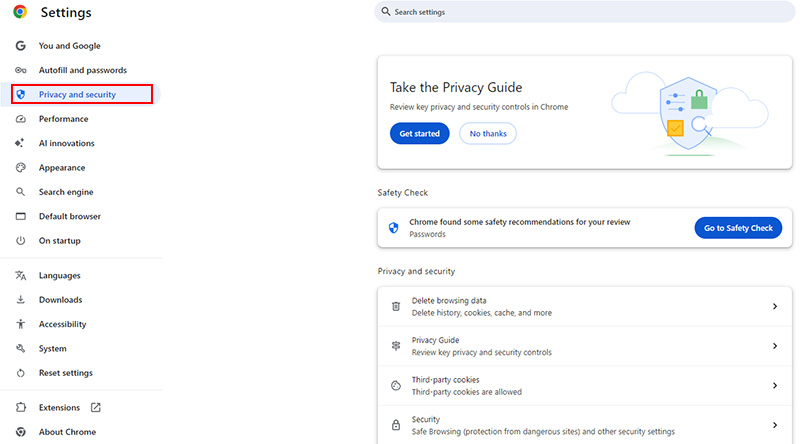
Step 2. Locate Deleting browsing data under the Privacy and Security section.
Step 3. Check Cached images and files, Download history, Site settings, or the equivalent cache option on the Delete browsing data window.
Tips: If you only want to clear temporary browser data, leave items such as saved passwords, autofill information, and browsing history unchecked.
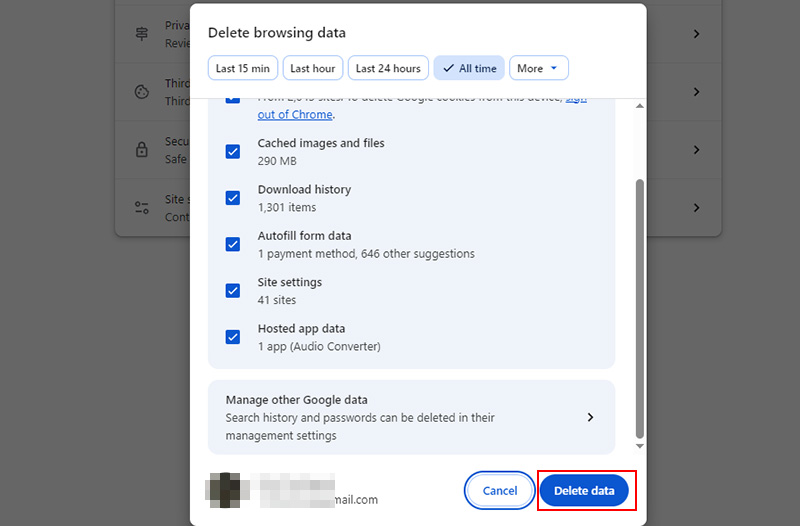
Step 4. Then click Delete data. This is one of the safest ways to handle how to delete temporary files in Windows when the space is being used by browser data rather than system files.
How to Delete Temporary Files in Windows Using CMD: Shortcuts
Command Prompt offers a quick way to reach several Windows cleanup tools without digging through multiple folders. With a few commands, you can open the user and system temporary-file locations, launch Disk Cleanup, or remove unnecessary files from the Windows component store. This approach is especially useful when you want a faster how to delete temporary files Windows 11.
Step 1. Open the user temporary folder. Press Win + R, enter %temp%, and press Enter. Press Ctrl + A to select everything, then hit Delete. Skip any files that are currently in use.
Step 2. Access system temporary files. To clear C:\Windows\Temp, press Win + R, enter the folder path, and click OK. Press Ctrl + A to select the files, then hit Delete.
Step 3. Hit Win + R, enter cleanmgr in the Run box, then press Enter. Search Disk Cleanup from Start and open it. For how to delete temporary files in Windows Explorer, right-click C: Properties > Disk Cleanup.
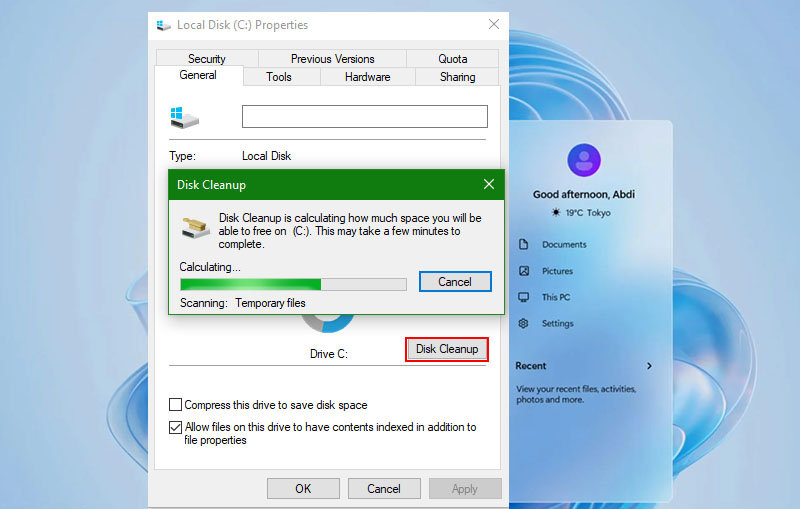
Step 4. Clean Windows component data using Command Prompt or PowerShell (DISM). Open Command Prompt/PowerShell as administrator.
Run: DISM.exe /Online /Cleanup-Image /StartComponentCleanup
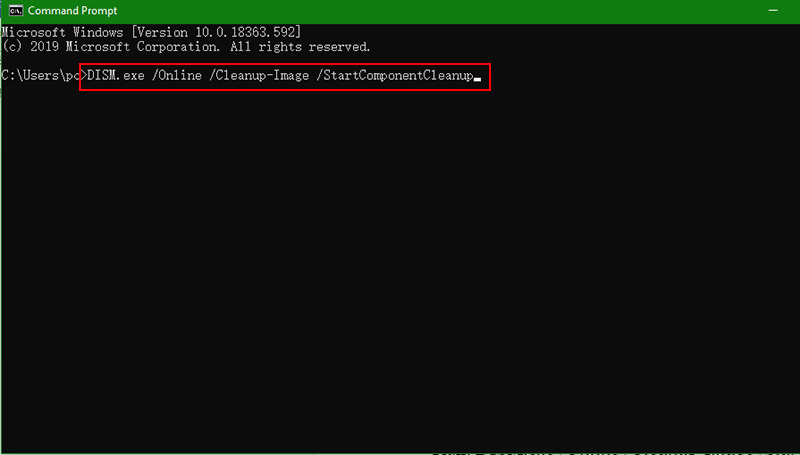
It can take several minutes, so don't close the Command Prompt while the operation is running. Together, these commands provide another practical way to manage how to delete temporary files in Windows without relying entirely on the Settings interface.
How to Delete Temporary Files Windows 11 Prefetch?
Prefetch files are part of Windows' performance cache. They record information about applications and system components so Windows can load frequently used programs more efficiently. Unlike ordinary temporary files, Prefetch data does not need routine cleaning. Use the following steps to figure out how to delete temporary internet files Windows 11.
Step 1. Use Win + R to bring up the Run window. Enter: Prefetch, and press Enter. If Windows asks for administrator permission, click Continue.
Step 2. The folder contains files with the .pf extension and other related data. These files are performance records rather than your personal documents. You do not need to identify each file individually before cleaning the folder.
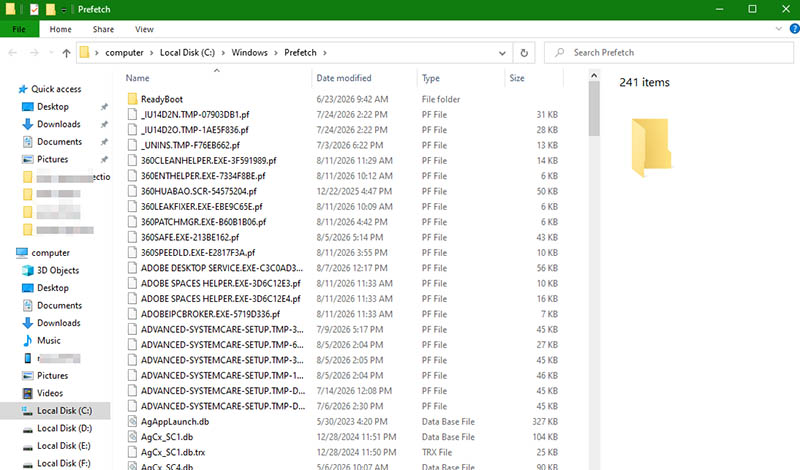
Step 3. Press Ctrl + A to select the contents you want to delete, then press Delete. If Windows reports that certain files are being used, leave those files alone.
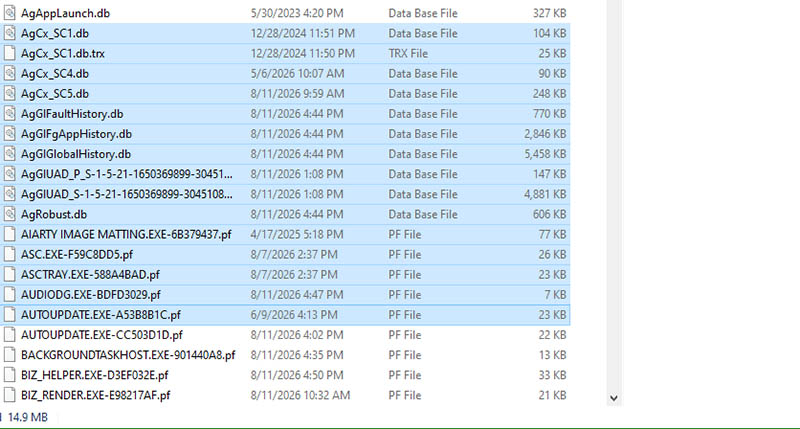
Tips: For routine maintenance, Windows' built-in Storage and Disk Cleanup tools are better choices than repeatedly clearing the Prefetch folder. They can remove unnecessary temporary data while leaving Windows to manage its performance cache.
Conclusion
Temporary files are easy to overlook, but they can take up a surprising amount of disk space. Windows offers several free options for how to delete temporary files in Windows, from Settings and Disk Cleanup to CMD. For faster and automatic cleanup, try IObit Advanced SystemCare to bring Windows temp files, browser cache, system logs, and software leftovers into one scan.
Advanced SystemCare Free
- Clean: 420 billion traces removed & 85 EB junk files cleaned
- Protect: 80 million unauthorized access blocked & 20 million bugs fixed
- Speed Up: 6 million hours of startup time saved & Turbo boost
- Optimize: Auto clean and auto care your PC with AI mode